
Previously we have done the same project using ESP8266 -01 and we received a lot of requests to do the same using NodeMCU ESP8266. So here it is ???? !!!.

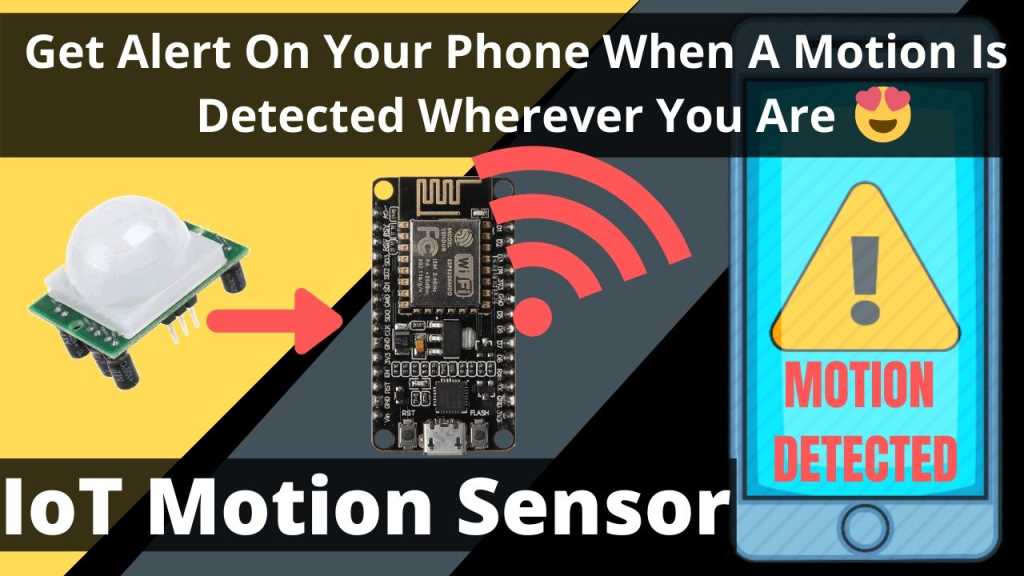
In this project, we are going to learn how to make an Internet of things motion sensor which will give us alert on our phone when motion is detected at the place we installed the sensor. Everything works through the internet so there is no limitation of the distance between the sensor and the phone.
Hardware Required
| Components | AliExpress | Amazon.com | Banggood |
| NodeMCU ESP8266 |  | | |
| PIR Motion sensor | | | |
Working Theory
- We have connected the PIR motion sensor to one of the GPIO pins of the NodeMCU ESP 8266.
- Whenever the PIR detects motion then the output sates of the PIR sensor will change which will be detected by the controller.
- We have programmed the NodeMCU to make an HTTP GET request to our IFTTT webhooks applet.
- Whenever the HTTP GET request has been made then it will trigger a notification alert on our mobile phone.
Circuit
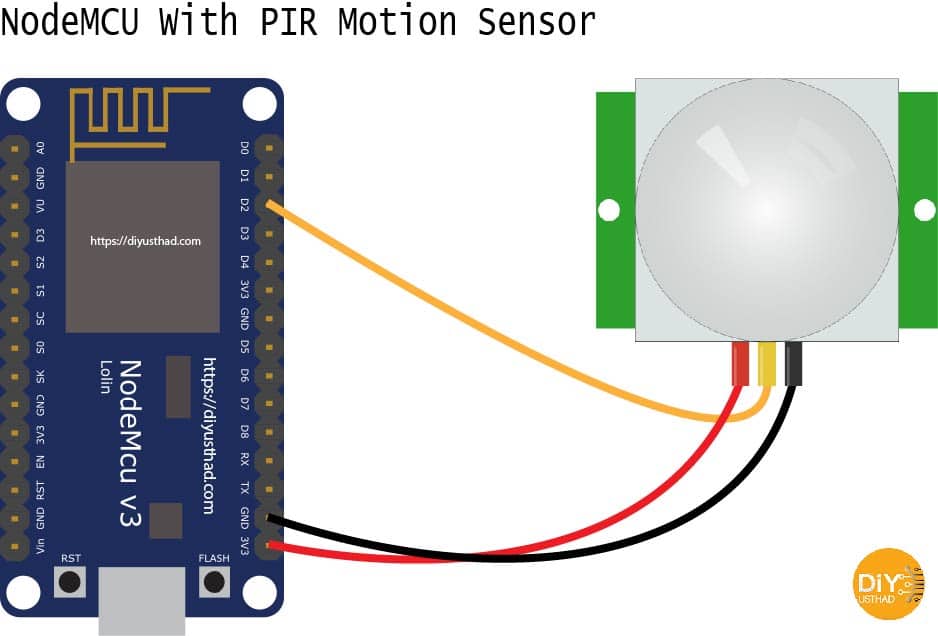
- Connect GND of PIR sensor to the GND of NodeMCU.
- Connect the VCC of PIR sensor to the 3.3v of NodeMCU.
- Connect the OUT of PIR sensor to the digital pin D2 (GPIO 4) of NodeMCU.
Note: Some PIR sensors will work only from 5v above so if you are using such a PIR sensor then instead to connecting the VCC of PIR to 3.3v of NodeMCU connect it directly to separate 5v supply.
Click Here for PIR Sensor Pinout THEPINOUT.TECH
Click Here for NodeMCU Pinout THEPINOUT.TECH
IFTTT Applet Creation
- Before creating Applet in IFTTT you need to create an account in the IFTTT web site. www.ifttt.com
- Also, download the IFTTT app for your Android or iPhone.
- Download the Android app from here.
- Download the iPhone app from here.
- After downloading the app login with your user credentials.
- Also, allow all the permissions which ask for.
Step 1:
- Click on your profile icon
- Then select the create option from the drop-down list.

Step 2:
- Now click on the +This button

Step 3:
- Now search for webhooks
- Then click on the Webhooks icon

Step 4:
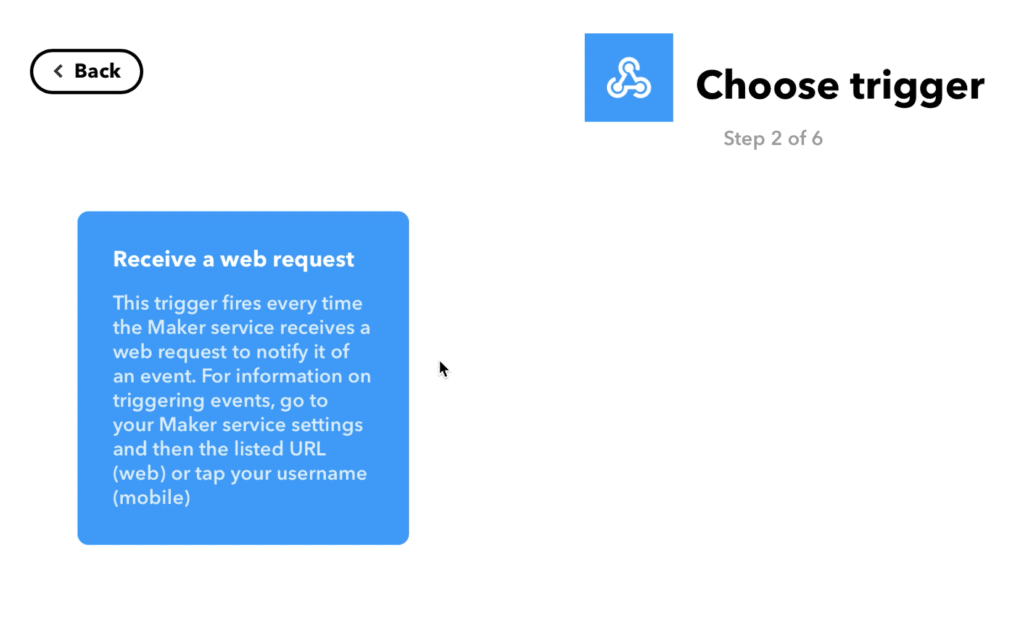
- From choose trigger option, click on the “receive a web request”.
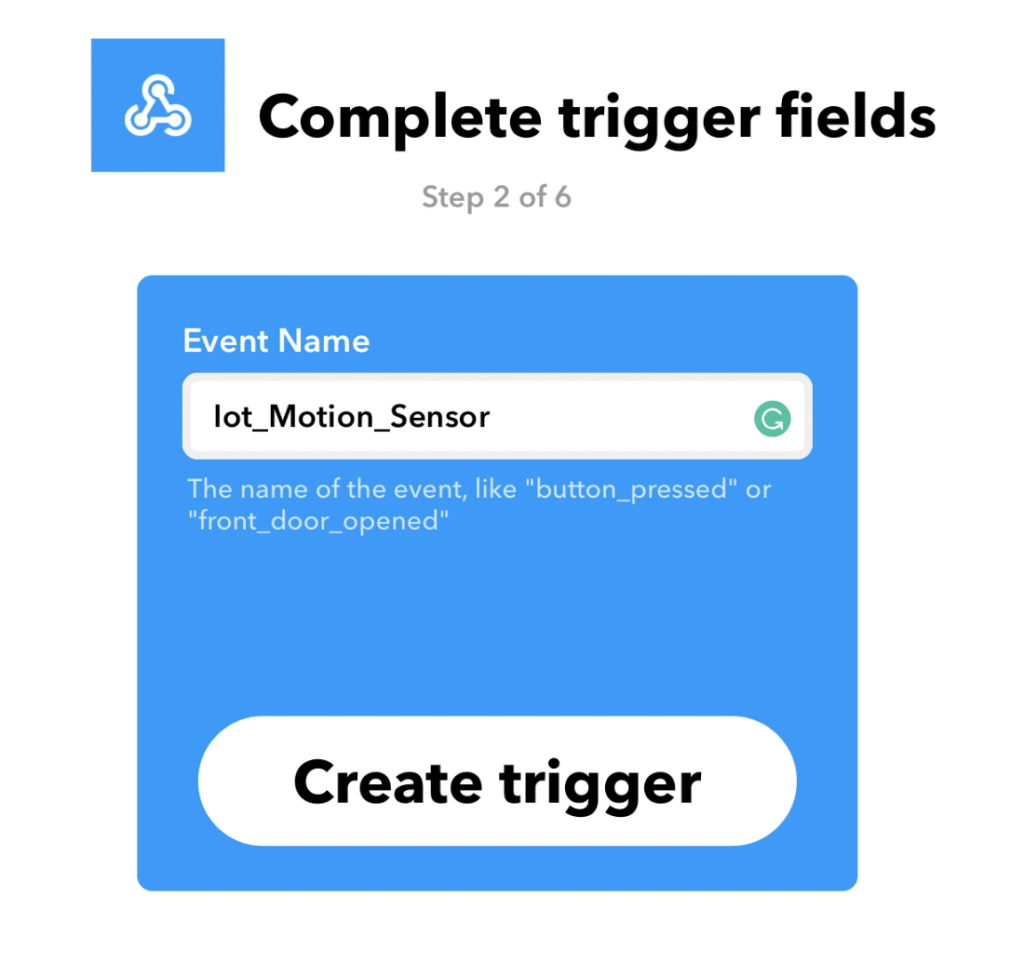
Step 5:
- Now give a name for the even
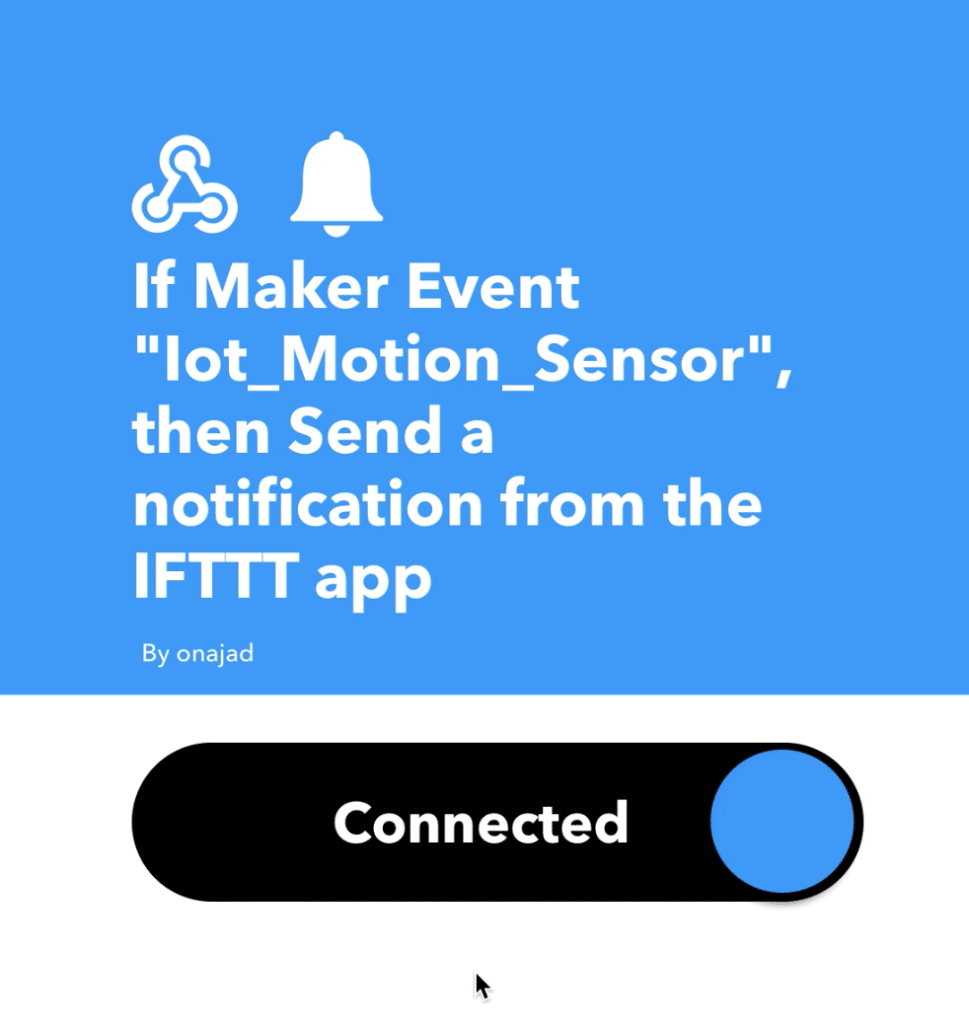
- I have written “iot_Motion_Sensor”.
- Note that there should not be any blank space between the words.
Step 6:
- Now clock on +That button

Step 7:
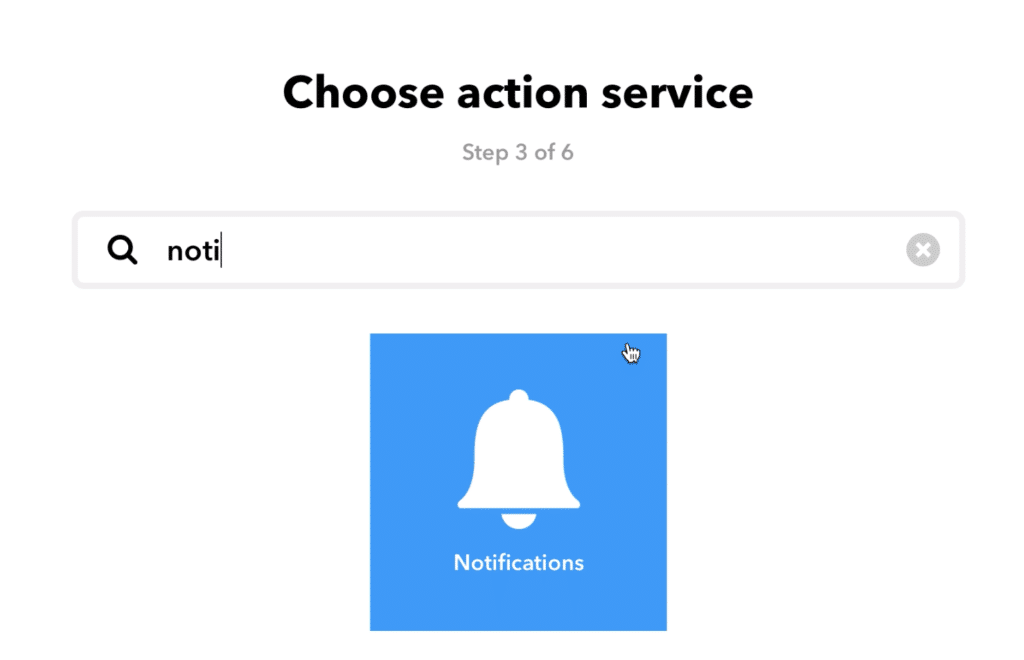
- Now from “choose action service”,
- Search for notification.
- And click on the notification icon.
- Note that you must be installed and logged in the IFTTT app on your phone for the notifications to work.
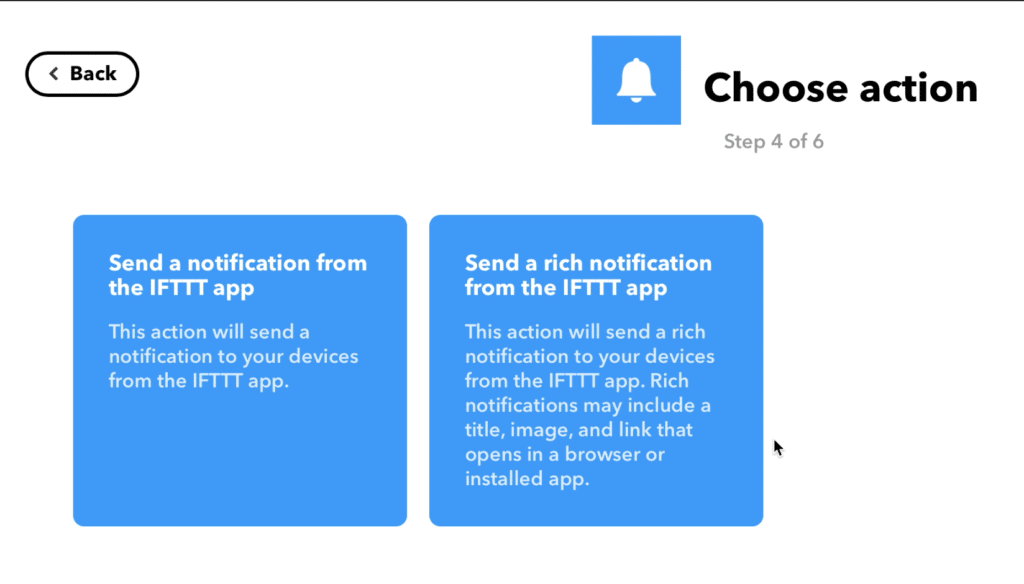
Step 8:
- Now from here choose any of the options you need
- I am going to choose simple notification instead of rich notification.
Step 9:
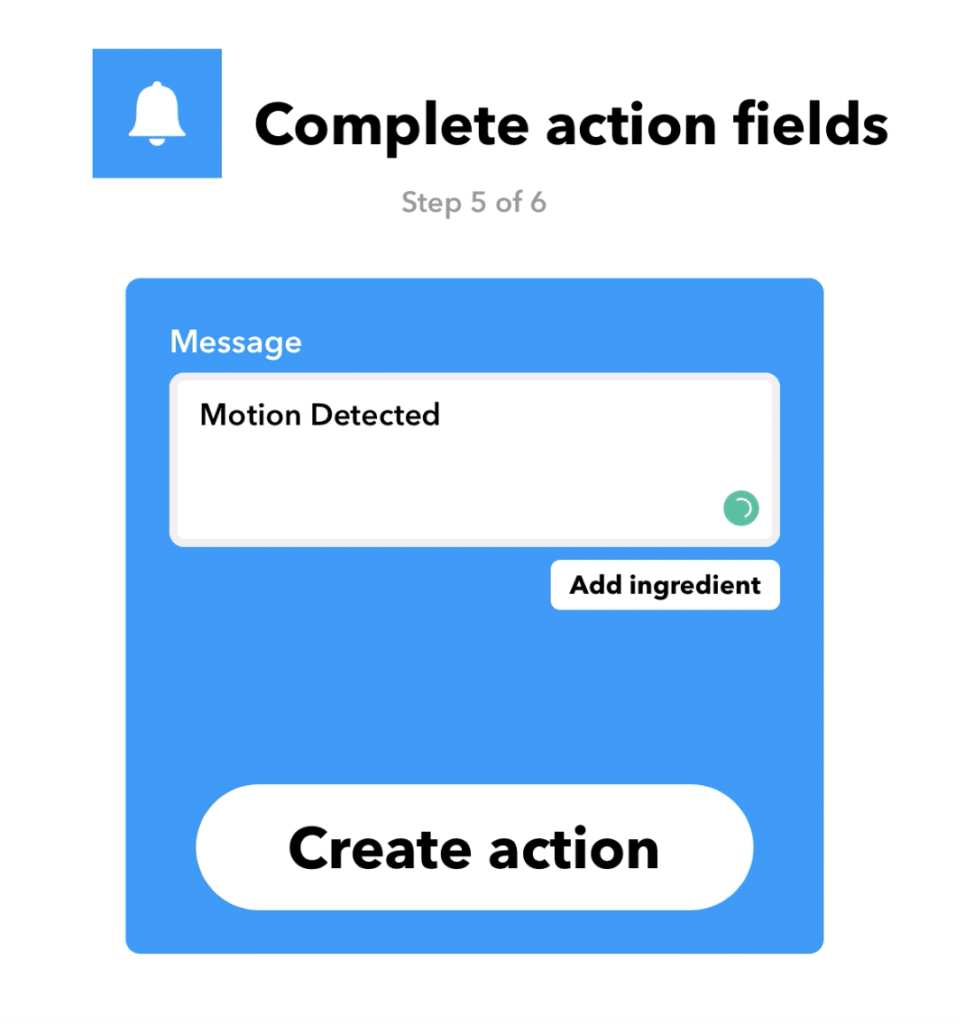
- Now in the message box write the notification which you needed to receive when the motion is detected.
- I am simply going to write “Motion Detected”
- If you have multiple sensors in place then you can write something like motion detected at garage or motion detected in closet etc..
- If you want you can give the time when the motion is detected.
Step 10:
- Now click finish
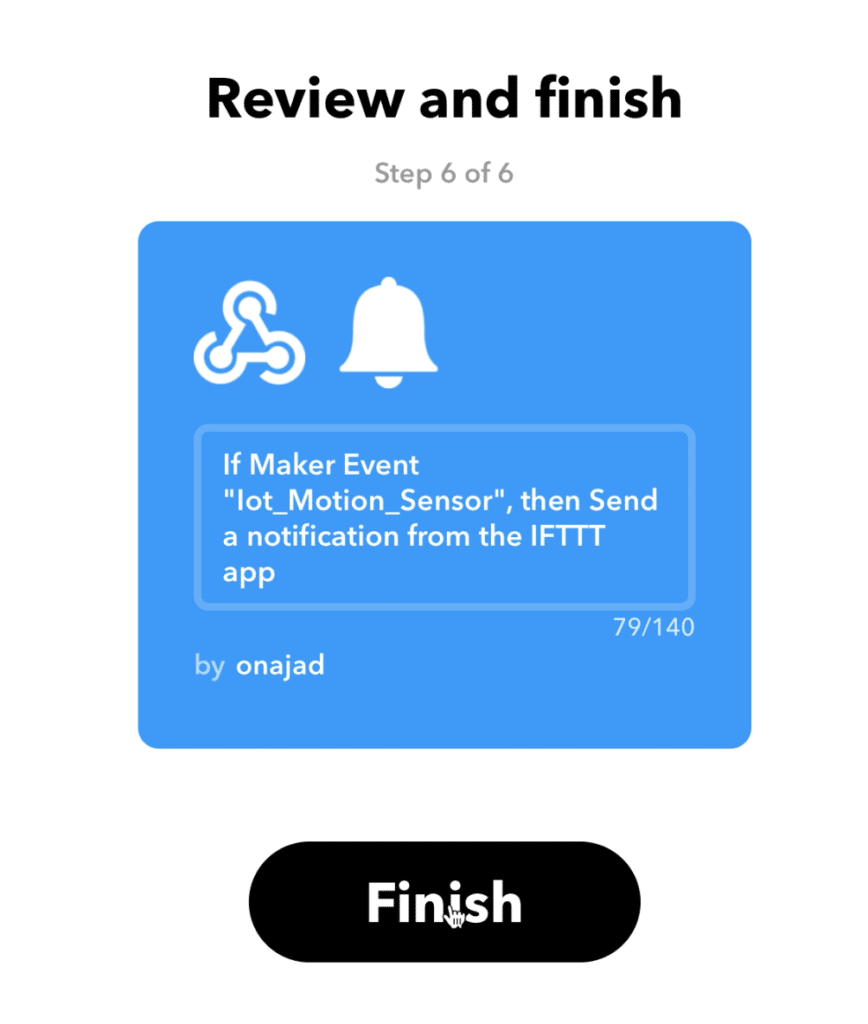
Step 11:
- That’s it now we have created the applet successfully.
Obtaining the HTTP GET request URL
Step 1:
- Log in to your IFTTT account.
- Click on your profile pic and choose My services

Step 2:
- Then select webhooks.

Step 3:
- Now click on Documentation

Step 4:
- Now replace {event} with our event name which we were given when we created our applet.
- In my case it was “Iot_Motion_Sensor”.
- There is a test button you can click on it to check whether your applet is working.
- Your secret key also will be on this page which you should not share with anyone.
- Don’t worry I have changed mine 😉

Uploading and testing
- Now upload the code to your NodeMCU.
- Then connect the circuit and power it on.
- Wait for 30 seconds to calibrate the PIR sensor, when calibration is done the onboard LED will turn OFF.
- Now whenever motion is detected the onboard LED will blink and
- A push notification will arrive on your phone saying “Motion Detected”.

Code
#include <ESP8266WiFi.h>
#include <ESP8266HTTPClient.h>

const char* ssid = "****"; //Your WiFI ssid
const char* password = "****"; //Your WiFi password
boolean PIRstate ; //variable to store PIR state
boolean lastPIRstate = HIGH;
int PIR = 4; //PIR connected to GPIO 4, NodeMCU pin D2

void setup () {

  WiFi.begin(ssid, password);
  Serial.begin(9600);

  while (WiFi.status() != WL_CONNECTED)
  {
    delay(1000);
  }

  pinMode(PIR, INPUT); //digitalWrite(PIR, LOW);

  pinMode(LED_BUILTIN, OUTPUT);

  delay(30000);

}

void loop()
{

  PIRstate = digitalRead(PIR);  //HIGH when motion detected, else LOW

  if (PIRstate != lastPIRstate)  //Checking if there is any motion
  {
    Serial.println("Motion Detected");
    digitalWrite(LED_BUILTIN, LOW);
    delay(100);
    digitalWrite(LED_BUILTIN, HIGH);
    if (WiFi.status() == WL_CONNECTED)  //Check WiFi connection status
    {
      HTTPClient http;  //Declare an object of class HTTPClient

      http.begin("Request link obtained from IFTTT");  //Specify request destination
      http.GET();   //Send the request
      http.end();   //Close connection

    }
    lastPIRstate = PIRstate;
  }
}
Thanks for the instructions. All fine… up to the ‘Code’ point. Where and how can I apply this code?
arduino ide
This code we will get an error as below
Step1:
Add to code at start
#include
WiFiClient wifiClient;
Step 2:
change in code line 43
http.begin(“Request link obtained from IFTTT”);
to
http.begin(wifiClient,”Request link obtained from IFTTT””);
Thanks for the correction
Hi Deepak Still having issues can you help please?
Forgot to mention error below is the error
Compilation error: call to ‘HTTPClient::begin’ declared with attribute error: obsolete API, use ::begin(WiFiClient, url)
Not getting notifications in IFTTT, any thoughts guys? cheers