A single board with Atmega 2560 + ESP8266.
![](https://diyusthad.com/wp-content/uploads/2020/05/HTB1hEc6Xu6sK1RjSsrbq6xbDXXa1.jpg)
Features
![chip icon](https://diyusthad.com/wp-content/uploads/2020/05/chip-icon.png)
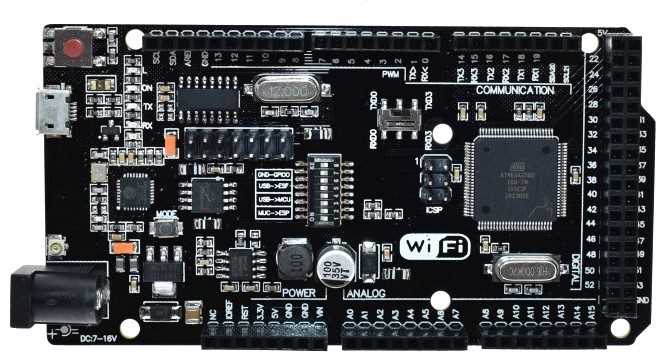
Full integration on one board: Mega R3 ATmega2560 and WiFi ESP8266 with memory 32Mb (megabyte)
![](https://diyusthad.com/wp-content/uploads/2020/05/Actions-view-split-left-right-icon.png)
All of the modules can work together or each separately.
![](https://diyusthad.com/wp-content/uploads/2020/05/Industry-Circuit-icon.png)
Every module has their own pinout headers.
![](https://diyusthad.com/wp-content/uploads/2020/05/wifi-icon.png)
The convenient solution for the development of new projects requiring Arduino Mega and WiFi
![](https://diyusthad.com/wp-content/uploads/2020/05/USB-icon.png)
Via USB you can update sketches and firmware for ATmega2560 and for ESP8266. For this onboard have the USB-serial converter CH340G
![](https://diyusthad.com/wp-content/uploads/2020/05/switch-off-icon-1.png)
Use this board is very simple The board has DIP-switch, to connect the modules, for example, to connect
- USB and ATmeg2560,
- USB and ESP8266,
- ATmega2560 and ESP8266