
If you are getting started to use Raspberry Pi with Processing 3 read the getting started guide here.

Blinking An LED
As we are beginning to learn programming Raspberry Pi GPIO with Processing, the LED blinking program is a good start.
Below are the keywords/functions we are going to cover in the first lesson
digitalWrite()
Sets an output pin to be either high or low
You need to set the pin to output by calling pinMode() before calling this function. Unlike on Arduino, it is not possible to set an input pin’s internal pull-up resistor using this function.
| Syntax | .digitalWrite(pin, value) |
|---|---|
| Parameters | pin int: GPIO pin value int: GPIO.HIGH (1) or GPIO.LOW (0) value boolean: true or false |
| Returns | void |
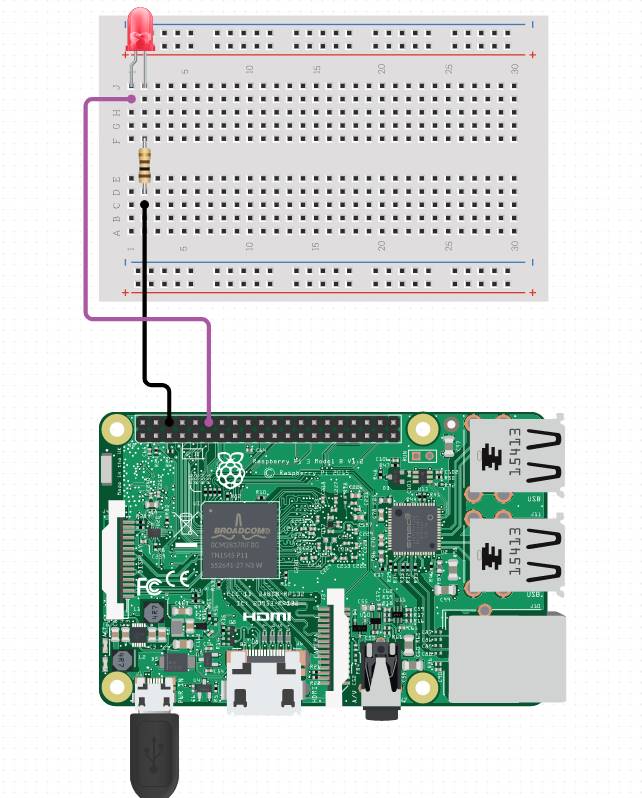
Circuit
Code
//LED Blinking on RPi using processing
//https://diyusthad.com

import processing.io.*;
int led = 18;
void setup() {
GPIO.pinMode(led, GPIO.OUTPUT);
frameRate(0.5);
}
void draw() {
GPIO.digitalWrite(led, GPIO.LOW);
delay(500);
GPIO.digitalWrite(led, GPIO.HIGH);
delay(1000);
}
Looking for a job? find your dream job at Jooble. Visit here