
What are we going to do?
In this Lesson of Raspberry Pi GPIO with Processing, we are going to make a button using processing sketch and using that button to control the LED attached to the Raspberry Pi.

When we press the LEFT mouse click the button will change color to RED and the LED will turn ON.
When we press the RIGHT mouse click the button will change color to GREEN and the LED will turn OFF
Watch the demo video ????
Keywords & Functions Used
Below are the new keywords and functions we are going to cover in lesson 2. Go to the previous lessons to know more about the previously learned keywords and functions.
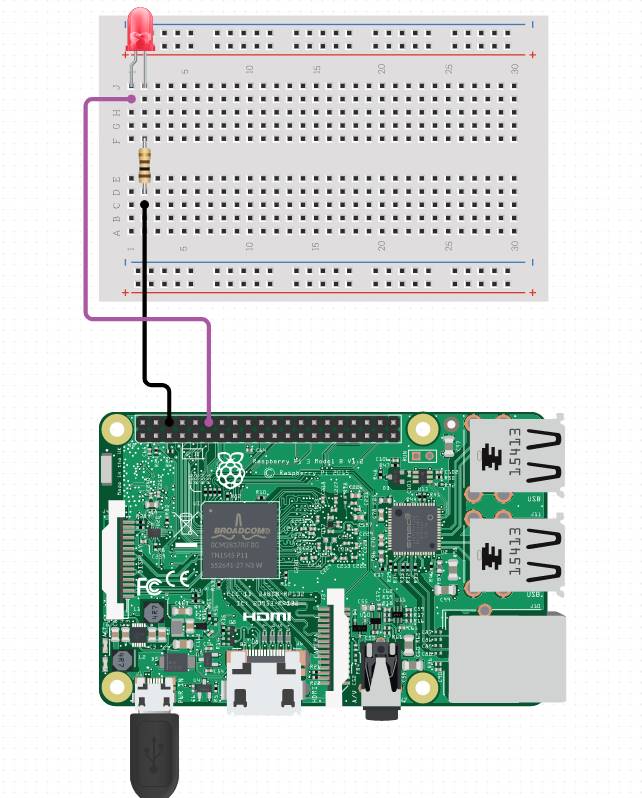
Circuit
Code
import processing.io.*;
int LED = 18;
void setup()
{
  size(640, 360);
  background(0);
  rectMode(CENTER);
  frameRate(25);

  GPIO.pinMode(LED, GPIO.OUTPUT);
  fill(255, 0, 0);
  rect(width/2, height/2, 50, 50, 7);
}

void draw()
{
  if (mousePressed && (mouseButton == LEFT) && mouseX <= 346 && mouseX >=295 && mouseY <= 203 && mouseY >= 153)
  {

    fill(0, 255, 0);
    rect(width/2, height/2, 50, 50, 7);
    GPIO.digitalWrite(LED, GPIO.LOW);
    //delay(100);
  }
  if (mousePressed && (mouseButton == RIGHT) && mouseX <= 346 && mouseX >=295 && mouseY <= 203 && mouseY >= 153)

  {
    fill(255, 0, 0);
    rect(width/2, height/2, 50, 50, 7);
    GPIO.digitalWrite(LED, GPIO.HIGH);
  }
}