
In 2012, a UK charity founded Raspberry PI, a mini single board computer intended for children in school. Today, Raspberry PI has evolved well beyond the classroom and is used in numerous projects including machine learning.

In this blog post, we’ll list 5 3D printing projects you can do with raspberry PI. But first, let’s start from the beginning.
What is Raspberry Pi?
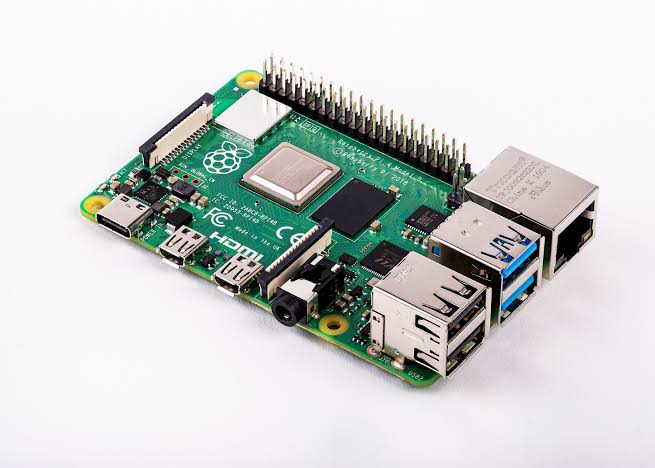
Raspberry PI is a Single Board Computer, the size of a credit card. It connects directly to a monitor and works with a keyboard and a mouse. A Raspberry PI replaces your CPU.
When it was originally released in the UK, it was made for kids to learn to program in school. However, it quickly became popular with users because of its efficiency and cost-effectiveness. Today, you can get a Raspberry PI CPU that has up to 8GB of RAM. The cheapest goes for $5.
Over the years, the use of Raspberry PI has expanded from basic uses like editing documents, surfing the web, and writing basic code to machine learning, 3D printing, and meteorology.
Here are 5 intriguing projects that you can do with raspberry PI.
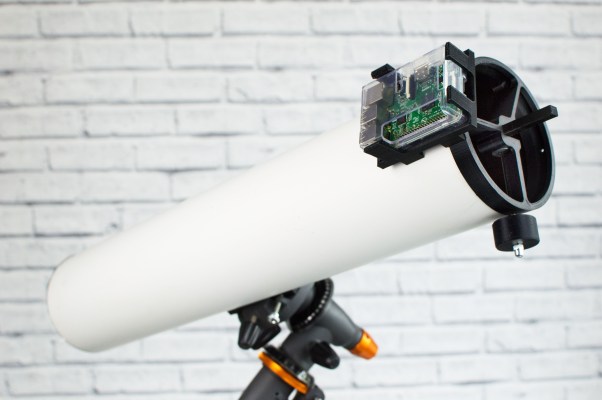
3D Printed Telescope with Raspberry PI Cameras
This first project involves building your telescope with 3D printed parts integrated with Raspberry PI Cameras. Wouldn’t it be fun to create your own powerful telescope for gazing into space?
The first part of this project is designing the telescope in software. After printing it, you find a way to attach the cameras and download the required software.
Benefits
- You have your DIY telescope
- Cheaper than a store-bought telescope
Materials Needed
- 3D printer
- Raspberry PI Cameras
- Wires
How-to
- Design the telescope and its parts in a designing software
- Print the telescope
- Download and install the necessary packages for the Raspberry PI
- Build it into the telescope
- Stare into the galaxy
Drone with Raspberry PI
With a little bit of 3D printing, you can build your own drone. All you require is the design for the drone, Raspberry PI for controlling, and Raspberry PI cameras for video recording.

The most difficult part is designing and printing a drone that actually works. Once you get past that, adding Raspberry becomes easy.
Benefits
- Build DIY drone
- Fewer limitations than commercialized ones
Materials Needed
- 3D printer
- Raspberry PI
- Buttons and PCB board for building controller
How-to
- First of all, design and print your drone parts
- Then attach Raspberry cameras
- Install necessary python code on the controller
- Connect with the drone
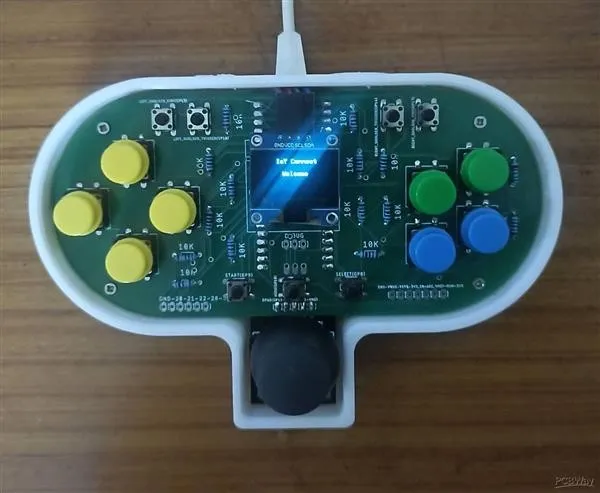
Gamepad with PCB board
A DIY gamepad allows you to build your own high-quality and long-lasting gamepad without paying high bucks for it.
A Raspberry PI computer can act as the basic CPU of the gamepad. You will need to print your PCB board with a 3D printer, buttons for the controls, a joystick, and a tiny OLED screen to get the moment-by-moment status of the controller. All of these components are very cheap.
Benefits
- Build a high-quality and personalized gamepad to match your particular needs
- Spend little money doing it
- Designed to fit your aesthetics
Materials Needed
- PCB board
- 3D printer
- Raspberry PI
- Buttons for game control
- Joystick
- OLED screen
- Resistors
How-to
- Purchase a Raspberry PI unit
- Code to show buttons how to work (preferably in Python)
- Design and 3dlD print a PCB board.
- Assemble
Houseplant Watering System
Imagine never again having a houseplant wither because you forgot to water it. This project is designed to make a DIY automated houseplant watering system using raspberry PI and 3D printing.
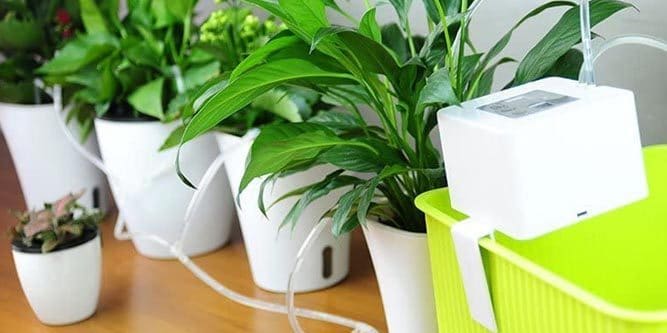
With a Raspberry PI CPU and a moisture sensor, you will have houseplants constantly blooming because they’re getting the moisture they need.
Benefits
- Automated watering of plants
- A cheap alternative to buying a domestic irrigation system
- Evergreen plants
Materials required
- Raspberry PI
- 3D printer
- Moisture sensor
- Water pump
- Jumper wires
How-to
- The first thing is to purchase a unit of Raspberry PI
- Download and install python code for reading data from the moisture sensor. A ready-made code is right here.
- Design and 3D print the water pump
- Connect the moisture sensor and water pump to Raspberry PI
- Dip the moisture sensor into the plant soil
- The jumper wires are attached to the pump
- Run your code and watch the magic
3D Printed Security Camera
Raspberry PI has gone beyond use in elementary classrooms. You can build a security camera that continuously streams the video and that notifies you when an object is detected.
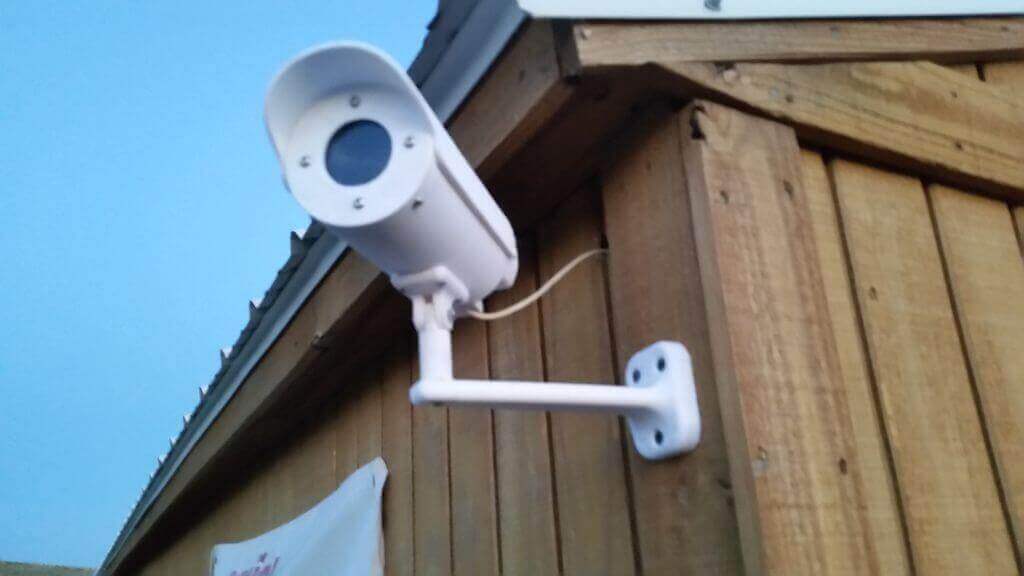
It means that you can mount your Raspberry PI security camera and leave your house, and you’ll know at the exact time someone calls on you.
Benefits
- Save money buying expensive security systems
- Continuously stream video
- Get updated instantly in your inbox when someone shows up
Materials Required
- 3D printer
- Raspberry PI
- Raspberry PI camera module
- Cables – camera and USB
- Nuts and screws
- Screwdriver
How-to
- The first thing is to decide where the camera will be and how it will be placed
- Then design and 3D print the camera box that will hold the smart security raspberry pi camera
- Next, connect the camera to the raspberry system and configure the camera
- Next, download and install libraries that will run the code for you
- Set Google to allow email notifications
- Mount your camera
Final Words
Raspberry PI has become popular in the tech industry because of its lightweight and power. Don’t be left out.
Are there any projects that resonated with you the most? Don’t be afraid to experiment.