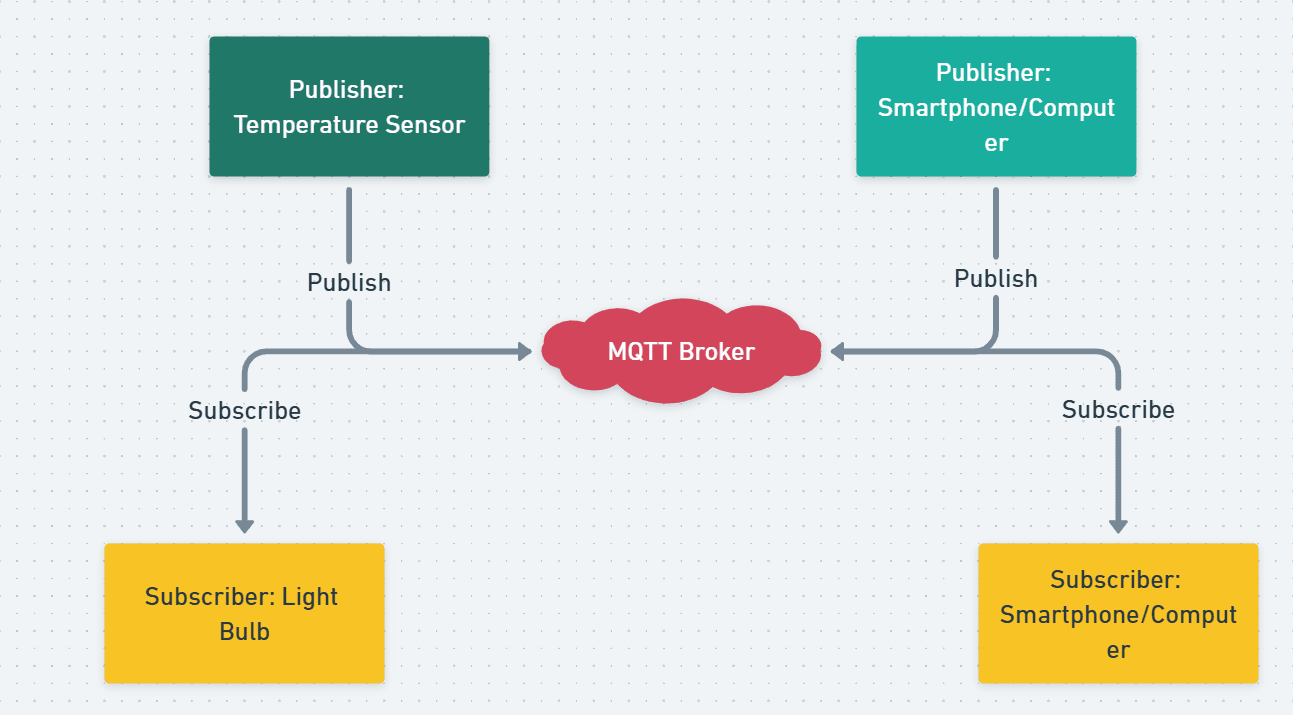
Setting up an MQTT broker on your Raspberry Pi is a straightforward process. This guide will walk you through each step, ensuring your Raspberry Pi is ready to handle MQTT communications.

Prerequisites
Before we begin, ensure you have:
- A Raspberry Pi with Raspberry Pi OS installed.
- An active internet connection.
- Access to the terminal, either directly or via SSH.
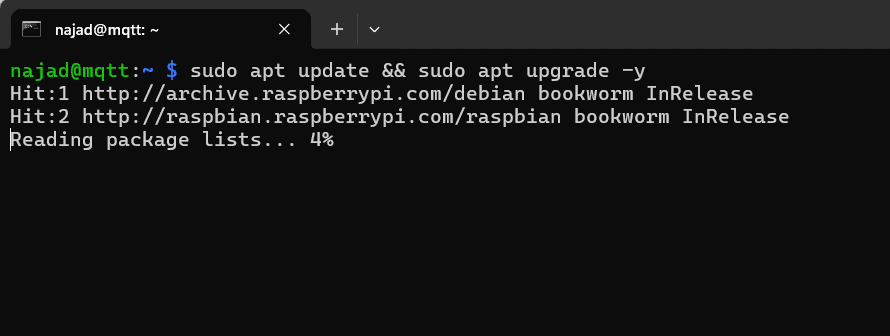
Step 1: Update Your System
Start by updating your Raspberry Pi to ensure all packages are current. Open the terminal and run:
sudo apt update && sudo apt upgrade -y
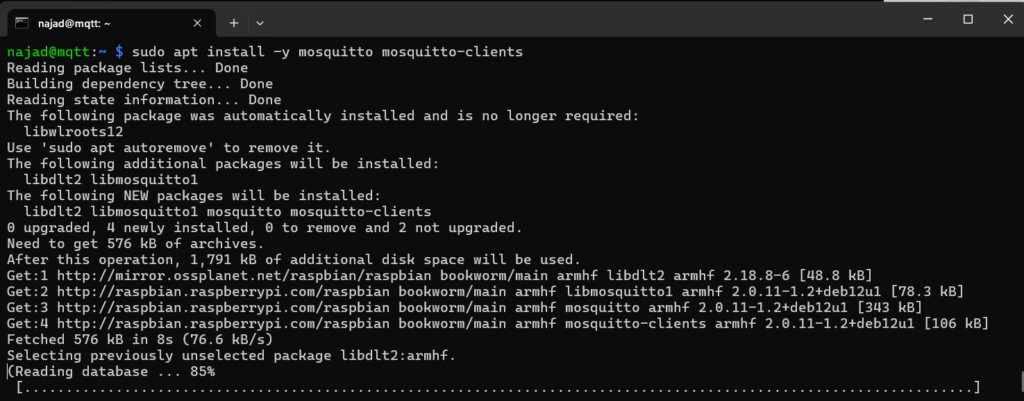
Step 2: Install Mosquitto Broker and Clients
Mosquitto is a popular MQTT broker. Install it along with its client tools by executing:
sudo apt install -y mosquitto mosquitto-clients
Step 3: Enable and Start the Mosquitto Service
To ensure Mosquitto starts automatically on boot, enable its service:
sudo systemctl enable mosquitto
Then, start the Mosquitto service:
sudo systemctl start mosquitto
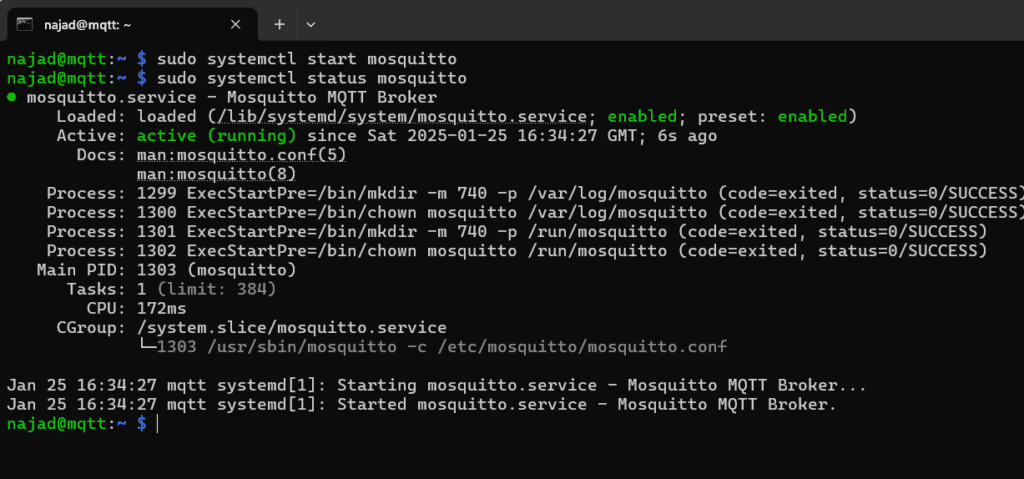
Step 4: Verify the Installation
Check if Mosquitto is running correctly:
sudo systemctl status mosquitto
You should see a status message indicating that the service is active and running.
Step 5: Configure Mosquitto for Remote Access
By default, Mosquitto only allows local connections. To enable remote access:
- Open the Mosquitto configuration file:
sudo nano /etc/mosquitto/mosquitto.conf - Add the following lines at the end of the file:
listener 1883 allow_anonymous true - Save and exit the editor by pressing
CTRL+X, thenY, andEnter. - Restart Mosquitto to apply the changes:
sudo systemctl restart mosquitto
Step 6: Test the MQTT Broker
With Mosquitto installed and configured, it’s time to test it:
- Open a terminal window and subscribe to a test topic:
mosquitto_sub -h localhost -t "test/topic" - Open another terminal window and publish a message to the same topic:
mosquitto_pub -h localhost -t "test/topic" -m "Hello, MQTT!"
In the first terminal, you should see the message “Hello, MQTT!” indicating that the broker is functioning correctly.

Conclusion
You’ve successfully set up an MQTT broker on your Raspberry Pi. This setup allows your Raspberry Pi to handle MQTT communications, serving as a central hub for your IoT devices. Remember to consider security measures, such as enabling authentication, especially if you plan to allow remote connections.