
Introduction
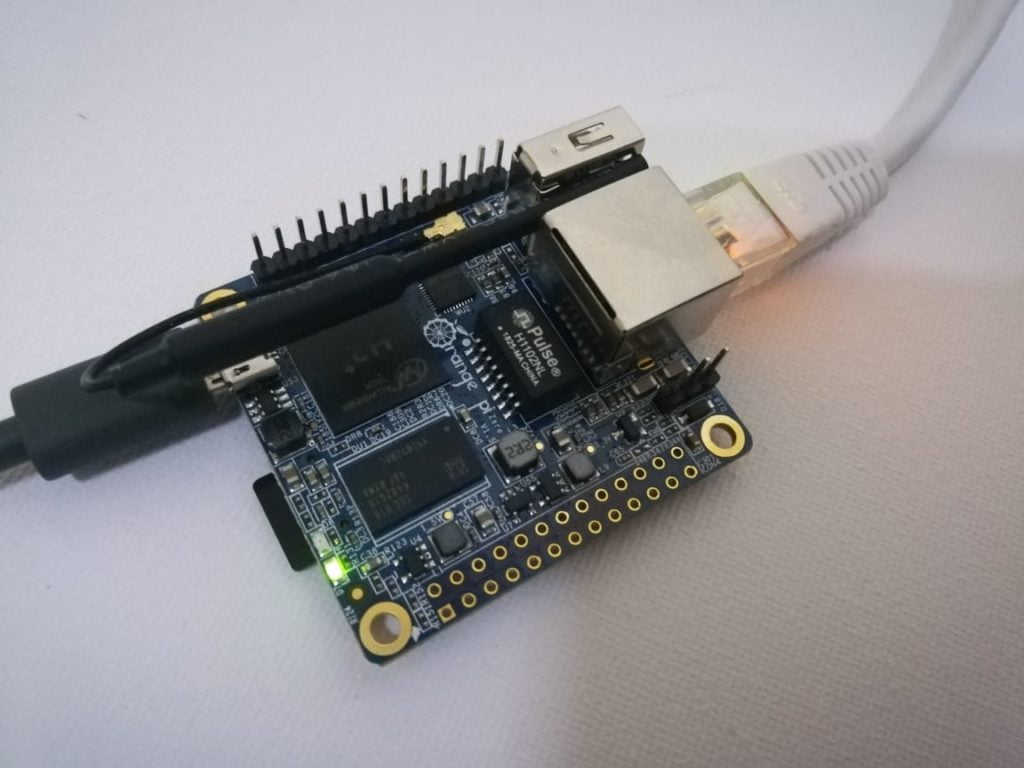
In this tutorial we are going to learn about how to install and configure an open source personal cloud called NextCloud in a Orange pi zero single board computer.

What is NextCloud?
Nextcloud offers the industry-leading, on-premises content collaboration platform. NextCloud technology combines the convenience and ease of use of consumer-grade solutions like Dropbox and Google Drive with the security, privacy, and control business needs.
Orange Pi Zero
Specifications
| CPU | H2 Quad-core Cortex-A7 H.265/HEVC 1080P. |
| GPU | ·Mali400MP2 GPU @600MHz ·Supports OpenGL ES 2.0 |
| Memory (SDRAM) | 256MB/512MB DDR3 SDRAM(Share with GPU)(256MB version is Standard version) |
| Onboard Storage | TF card (Max. 32GB)/ 2MB Spi Flash |
| Onboard Network | 10/100M Ethernet RJ45 POE is default off. |
| Onboard WIFI | XR819, IEEE 802.11 b/g/n |
| Audio Input | MIC |
| Video Outputs | Supports external board via 13pins |
| Power Source | USB OTG can supply power |
| USB 2.0 Ports | Only One USB 2.0 HOST, one USB 2.0 OTG |
| Buttons | Power Button |
| Low-level peripherals | 26 Pins Header, 13 Pins Header, with 2x USB, IR pin, AUDIO(MIC, AV) |
| LED | Power led & Status led |
| Supported OS | Android, Lubuntu, Debian |
Hardware used
| Components | Amazon.in | Amazon.com | AliExpress | Banggood |
| Orange Pi Zero |  | | | |
| 16 GB SD card | | | | |
Step 1: Download the required files and software
| Etcher | |
Armbian Buster  |
Step 2: Flashing SD card
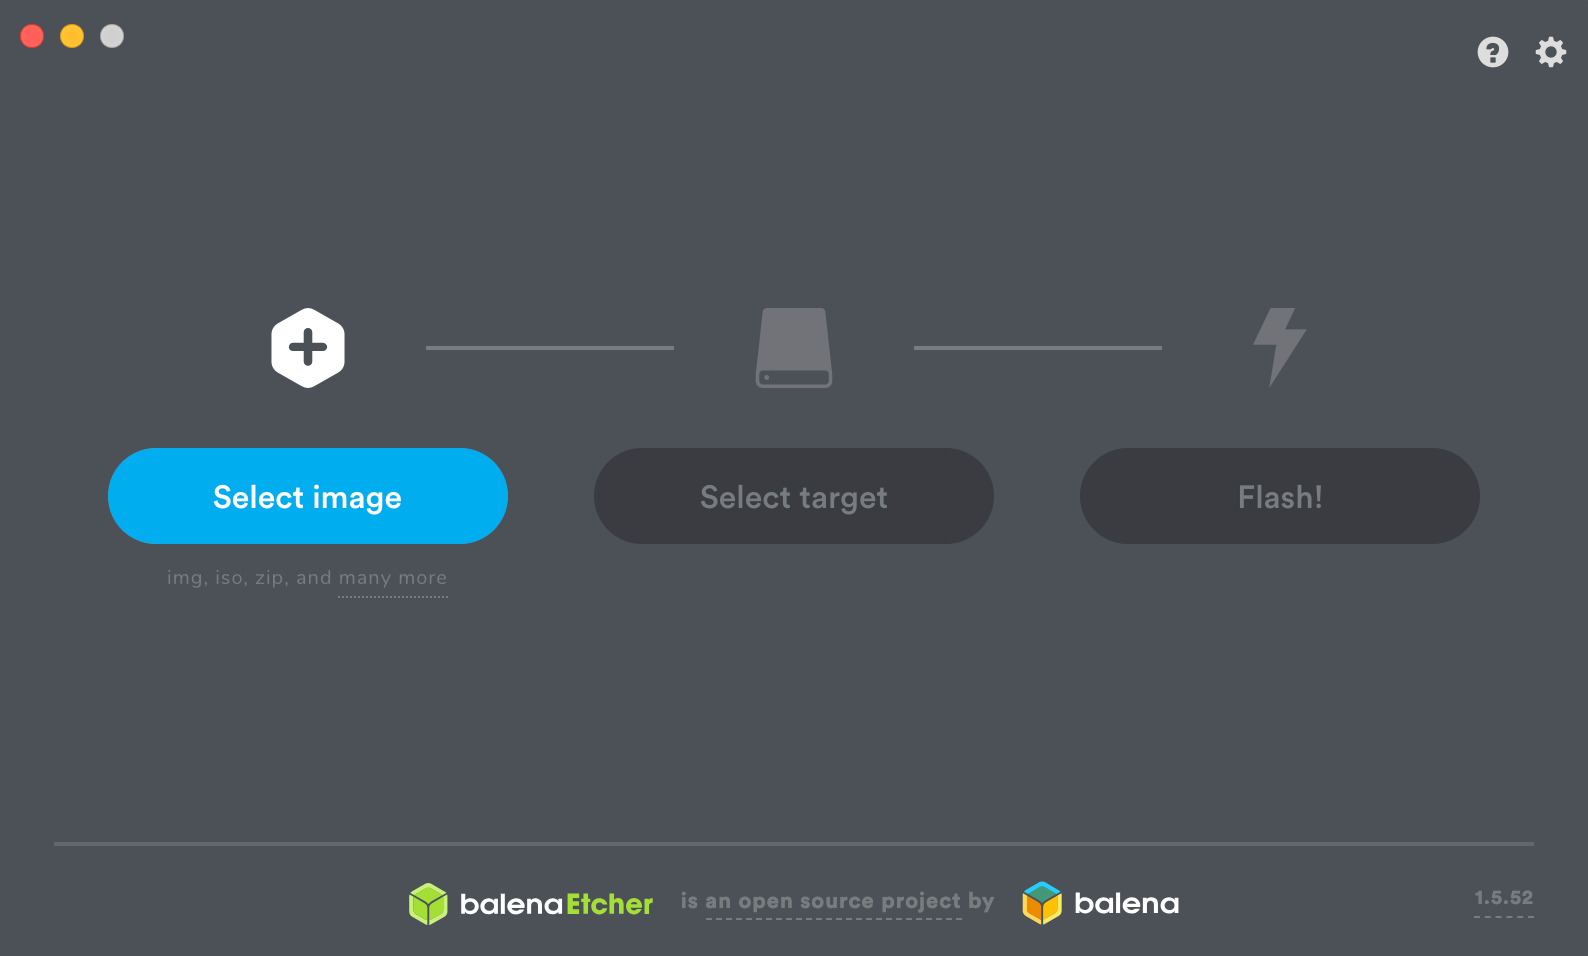
- Open etcher software.
- Click on the select button and open the downloaded image file, the file may be double compressed so extract it before to get the image file.
- Insert your SD card to the computer and select it using the select target button.
- Now click the flash button and wait for the process to finish.
Step 3: Connecting to network
- You can connect your board directly to your router using an ethernet cable.
Step 4: Obtaining IP address and login via SSH
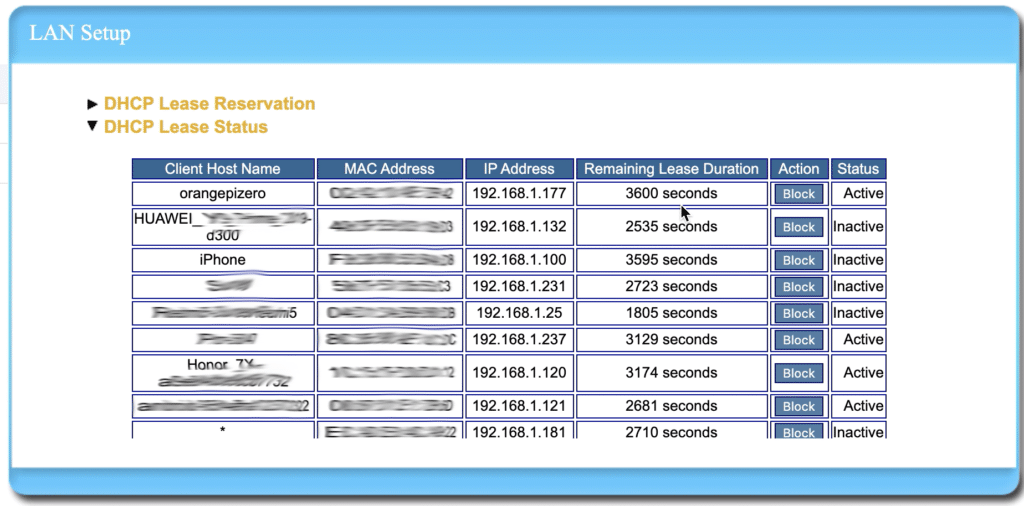
- Find the router IP and login user name and password, it will be printed behind the router.
- Login to your router configuration page from your laptop using the IP of your router. The laptop must be connected to the network.
- Go to DHCP settings and open DHCP client list or DHCP lease status. Based on the manufacturer and model of the router there will be some changes in the settings order and names. But always look for the DHCP settings and from there you can get the list of the connected device and the IP addresses.
From that list find orangepi and note down the IP address associated with.
- To login via SSH, in windows, you can use putty, download it from here. In Mac and Linux you can use terminal.
- By default the user name will be root and password will be 1234.
- Type
ssh root@ipaddress
- Then when promted type ‘yes’ and enter the password 1234
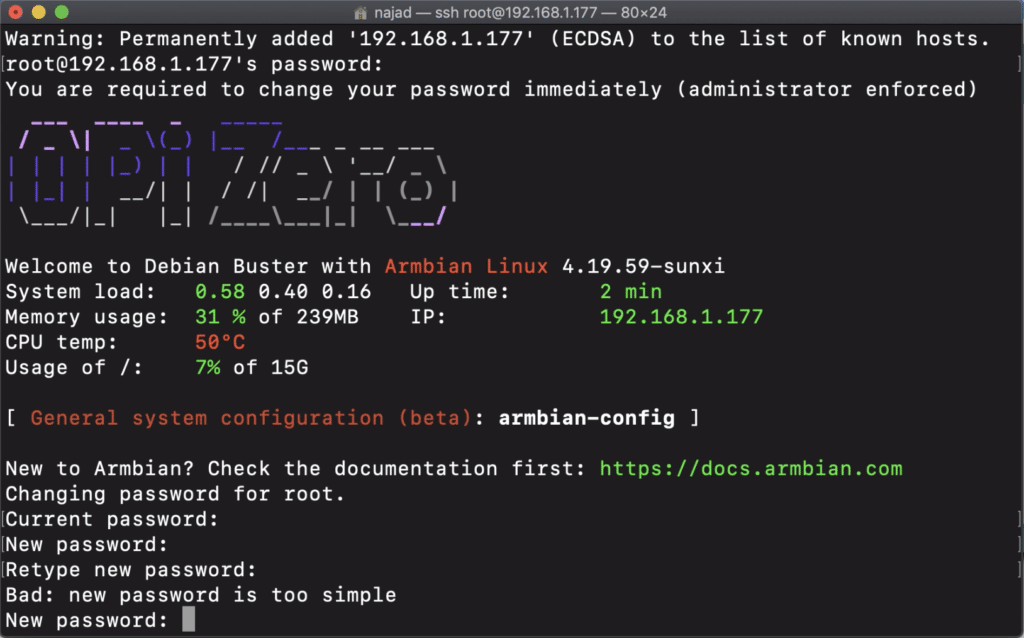
- Then it will be prompted for you to set new password so follow the on screen instructions.
Step 5: Converting Debian installation, into a lightweight DietPi system
- Now in the terminal window copy paste the below code and hit enter and wait for the updates to finish.
apt-get update; apt-get install -y systemd-sysv ca-certificates sudo wget locales --reinstall
- Now again paste the below code and hit enter and follow the onscreen prompts.
wget https://raw.githubusercontent.com/MichaIng/DietPi/master/PREP_SYSTEM_FOR_DIETPI.sh -O PREP_SYSTEM_FOR_DIETPI.sh
#wget https://raw.githubusercontent.com/MichaIng/DietPi/jessie-support/PREP_SYSTEM_FOR_DIETPI.sh -O PREP_SYSTEM_FOR_DIETPI.sh
#wget https://raw.githubusercontent.com/MichaIng/DietPi/beta/PREP_SYSTEM_FOR_DIETPI.sh -O PREP_SYSTEM_FOR_DIETPI.sh
#wget https://raw.githubusercontent.com/MichaIng/DietPi/dev/PREP_SYSTEM_FOR_DIETPI.sh -O PREP_SYSTEM_FOR_DIETPI.sh
chmod +x PREP_SYSTEM_FOR_DIETPI.sh
./PREP_SYSTEM_FOR_DIETPI.sh
- It will take approx 20 minutes time to finish.
- While installing it will prompt you to enter some information, follow the screen instruction.
- Choose Orange Pi Zero H+ from device list when prompted.
- Now your OS will be changed to DietPi system.
- After installation type reboot to reboot the Orange Pi.
- Then login via SSH with the user name root and password
dietpi .
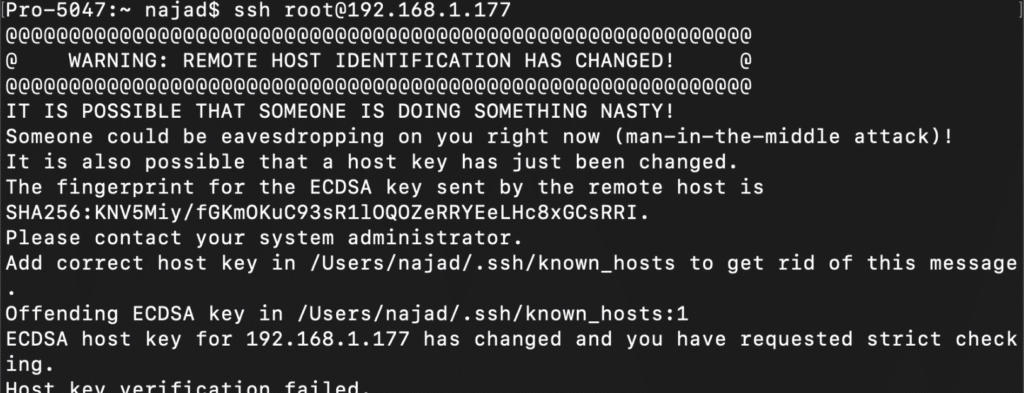
- Sometimes a warning message says “REMOTE HOST IDENTIFICATION CHANGED”
- To rectify that type
sudo rm /users/"type your user name"/.ssh/known_hosts
- We have just deleted the old keys stored on our computer.
- Now login via SSH.
- The installation will continue for some more time, provide the information when prompted.
Step 6: Installing NextCloud
- It will automatically prompt you to the DietPi-Software window, if it doesn’t copy paste the below code in to the terminal window.
dietpi-software
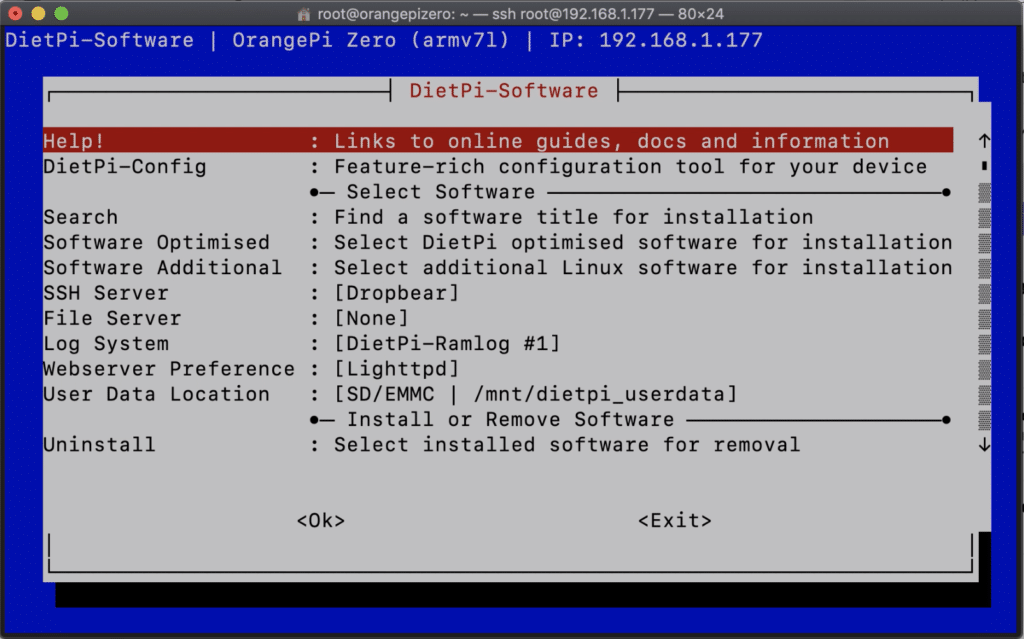
- Now use the arrow key to select software optimised and select ok.
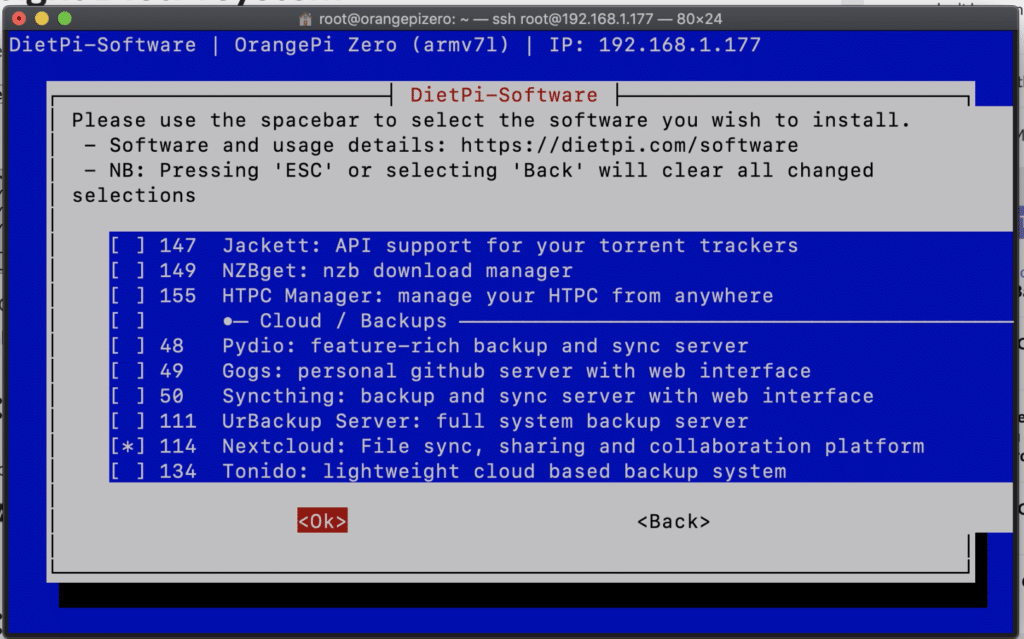
- Now from the from the software list select nextcloud, use space bar to select and the select ok using tab and hit enter.
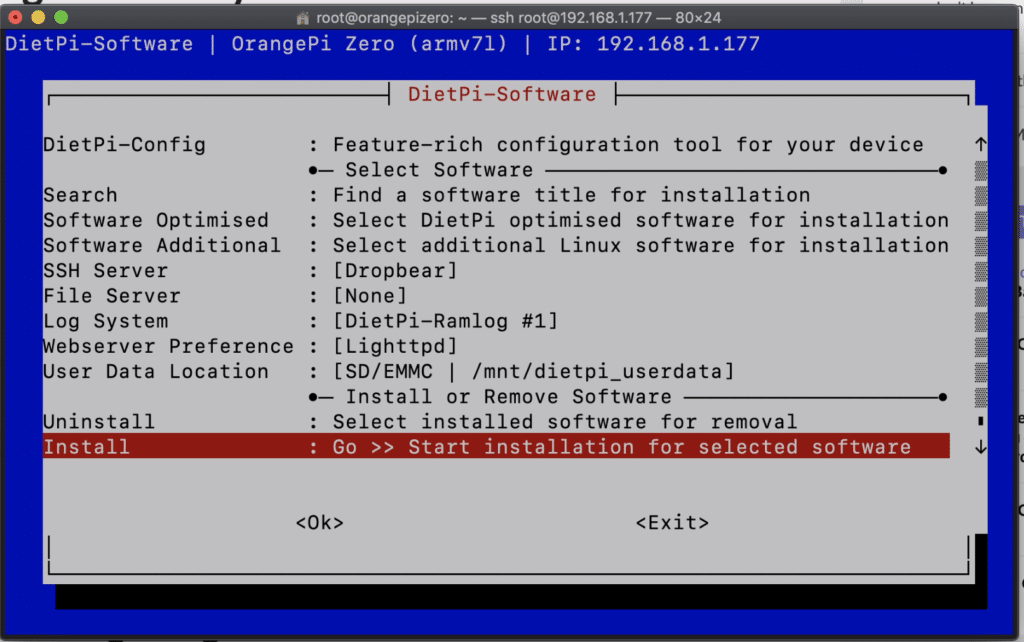
- Now choose install using the arrow key and select ok.
- It will take approximately 20 minutes to complete the installation so go and grab a nice cup of coffee.
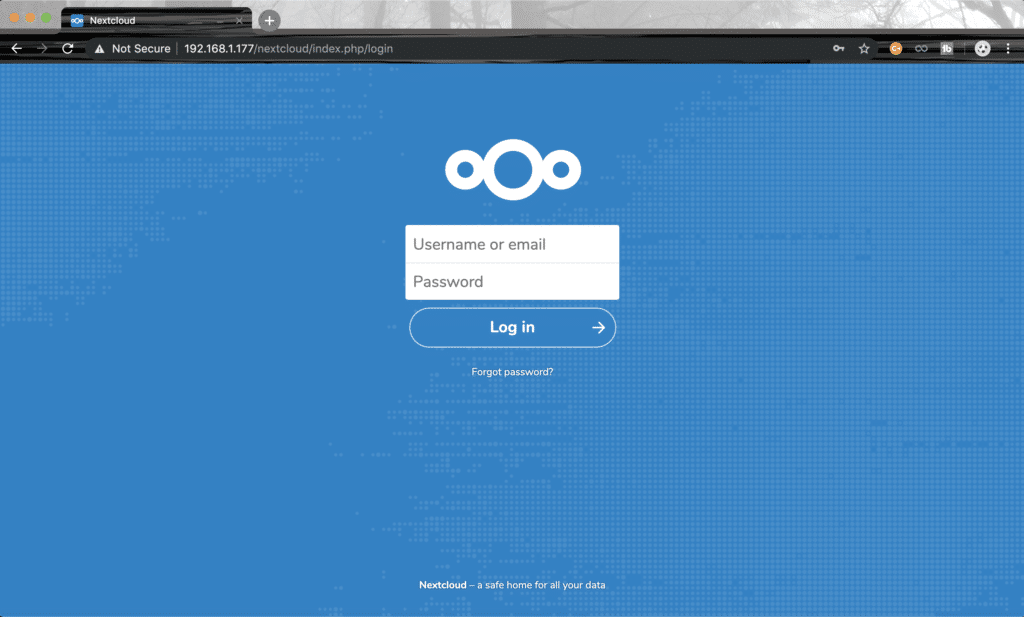
- To check whether the
nextcloud server is up and running open a web browser and type <orangepi_ipaddress>/nextcloud in my case its 192.168.1.177/nextcloud, then you should be able to see the below page.
Step 7: Configuring NextCloud
- Now login to your
nextcloud server using the user name admin andpassword dietpi .
Step 8: Installing NextCloud clients for Windows, Mac, Linux, Android or iPhone.
Go to https://nextcloud.com/install/#install-clients and install the client software for which ever platform you needed.
To buy electronic components order from UTSOURCE
Would be nice to see how to config the Wirkung Cloud. Add Users etc.