


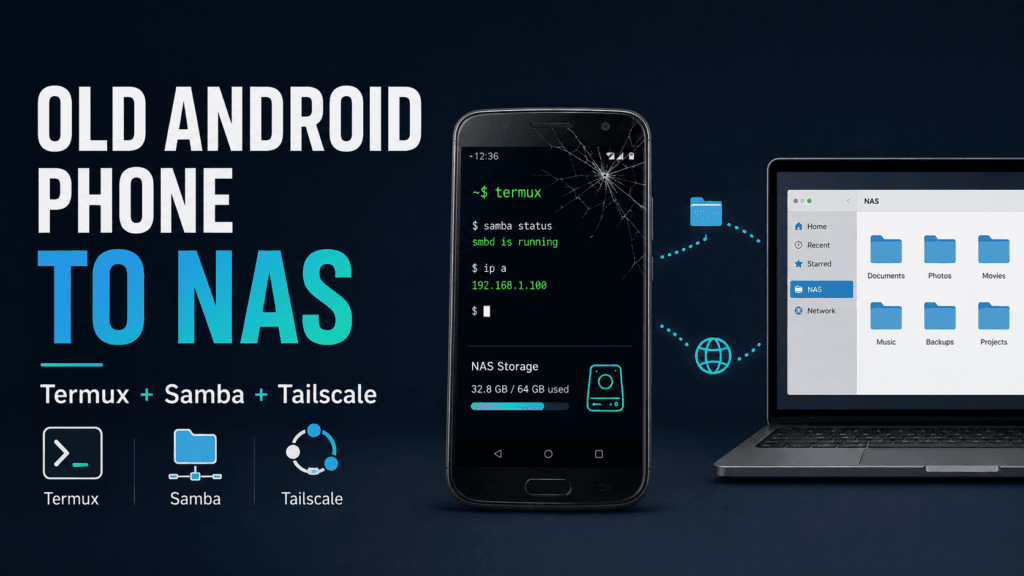
If you have an old Android phone lying around, you can turn it into a small personal NAS without buying a Raspberry Pi or dedicated server.
In this guide, you’ll learn how to use:
- Termux
- Samba
- File Browser
- Tailscale
- Termux
The final setup will let you access your Android phone’s storage from:
- Windows
- macOS Finder
- Android file managers
- Any device connected through Tailscale
- A normal web browser using File Browser
My test device was an Honor Android phone with a broken touchscreen, so the entire setup was managed remotely using SSH and ADB.
Final Setup
Your Android phone will work like this:
Android Phone
│
├── Termux
│   ├── Samba
│   │    └── SMB file sharing
│   │
│   ├── File Browser
│   │    └── Web-based file manager
│   │
│   └── SSH
│
├── Tailscale
│    └── Remote private network
│
└── Internal Storage
     ├── Download
     ├── DCIM
     ├── Movies
     └── Other files
After everything is configured, the phone can reboot and automatically bring the services back online.
1. Install Termux
Install Termux on your Android phone.
After opening Termux, update the packages:
pkg update
pkg upgrade
Give Termux access to Android storage:
termux-setup-storage
Allow the storage permission when Android asks.
You should now have:
~/storage/shared
This directory points to your Android internal storage.
Test it:
ls ~/storage/shared
You should see folders such as:
Android
DCIM
Download
Movies
Pictures
2. Install Samba
Install Samba:
pkg install samba
Create the Samba configuration directory if required:
mkdir -p "$PREFIX/etc/samba"
Copy the example configuration:
cp "$PREFIX/share/doc/samba/smb.conf.example" \
"$PREFIX/etc/samba/smb.conf"
Now edit the configuration file:
nano "$PREFIX/etc/samba/smb.conf"
Add a share like this:
[internal]
    comment = Internal storage
    path = /storage/emulated/0
    browseable = yes
    read only = no
    writable = yes
    guest ok = no
Also make sure this setting is present:
bind interfaces only = no
This allows Samba to accept connections from both your local Wi-Fi address and your Tailscale address.
3. Why Samba Uses Port 4445
Normal SMB uses port 445.
However, Android does not allow normal Termux applications to bind to privileged ports below 1024 unless the phone is rooted.
Because of this, Termux Samba commonly uses port 4445.
Your Samba server will therefore be accessed using:
PHONE_IP:4445
instead of the standard port 445.
4. Create a Samba Password
First, check your Termux username:
whoami
You may see something similar to:
u0_a202
Because Termux is not running as root, use Samba local mode:
smbpasswd -L -a "$(whoami)"
Enter your new Samba password twice.
Verify the Samba users with:
pdbedit -L
5. Check the Samba Configuration
Run:
testparm -s "$PREFIX/etc/samba/smb.conf"
Make sure your share appears:
[internal]
You can also list the available shares:
smbclient -L //127.0.0.1 -p 4445 -U "$(whoami)"
You should see something similar to:
Sharename       Type
---------       ----
internal        Disk
IPC$            IPC
6. Start Samba
Start Samba:
smbd -D -s "$PREFIX/etc/samba/smb.conf"
Check that it is running:
pgrep -a smbd
You should see one or more Samba processes.
Now test the share locally:
smbclient '//127.0.0.1/internal' -p 4445 -U "$(whoami)"
Enter your Samba password.
If everything works, you should get:
smb: \>
Type:
ls
You should see the Android storage folders.
Exit with:
exit
7. Connect From macOS Finder
First, find the Android phone’s Wi-Fi IP address.
For example:
192.168.1.25
On your Mac, press:
Command + K
Alternatively, open:
Finder
→ Go
→ Connect to Server
Enter:
smb://192.168.1.25:4445/internal
Use your Termux username:
u0_a202
Then enter the Samba password you created earlier.
Your Android internal storage should now appear directly in Finder, allowing you to copy files almost like you would with a normal NAS.
8. Install File Browser
Samba is useful for Finder and file managers, but accessing files through a web browser can sometimes be more convenient.
You can install File Browser inside Termux and expose the same Android storage.
Once configured, open an address like this from another device:
http://192.168.1.25:8080
This gives you two ways to access the same files:
Samba
→ Finder / SMB file manager

File Browser
→ Web browser
9. Add Tailscale
Local Wi-Fi access is useful, but Tailscale makes the setup much more powerful.
Install the official Tailscale Android app and sign in.
After connecting, your phone will receive a private Tailscale address similar to:
100.x.x.x
You can now access Samba using the Tailscale IP:
smb://100.x.x.x:4445/internal
You are no longer limited to your home Wi-Fi network.
For example:
Android NAS at home

      Internet

         │
      Tailscale
         │
         ▼

Laptop in another location
The traffic remains inside your private Tailscale network.
10. Make Tailscale Start Automatically
For a proper NAS, Tailscale needs to reconnect after the phone reboots.
If Android exposes the Always-on VPN option, enable it for Tailscale.
On some Android phones, this option may be hidden. If you have ADB access, you can configure the Always-on VPN directly.
First, check that the Tailscale package name is:
com.tailscale.ipn
Then run this command from your computer:
adb shell settings put secure always_on_vpn_app com.tailscale.ipn
Disable VPN lockdown:
adb shell settings put secure always_on_vpn_lockdown 0
Verify the setting:
adb shell settings get secure always_on_vpn_app
It should return:
com.tailscale.ipn
After this, Tailscale should reconnect automatically after Android boots.
11. Automatically Start Samba With Termux
Now configure Samba to start automatically after Android reboots.
Create the Termux directory:
mkdir -p ~/.termux/boot
Create a Samba startup script:
nano ~/.termux/boot/20-samba
Add the following:
#!/data/data/com.termux/files/usr/bin/sh

termux-wake-lock

sleep 15

if ! pgrep smbd >/dev/null 2>&1; then
    smbd -D -s "$PREFIX/etc/samba/smb.conf"
fi
Save the file, then make it executable:
chmod +x ~/.termux/boot/20-samba
The 15-second delay gives Android enough time to initialize storage and networking before Samba starts.
12. Automatically Start File Browser
If you are using File Browser, you can create another boot script.
For example:
nano ~/.termux/boot/10-filebrowser
Your script should start File Browser using the same command and database you normally use.
The boot directory can then look like this:
~/.termux/boot/
├── 10-filebrowser
└── 20-samba
After rebooting Android:
Android boots
     │
     ├── Tailscale connects
     │
     └── Termux:Boot
            ├── File Browser
            └── Samba
The phone will now behave much more like a dedicated server.
13. Prevent Android From Killing Termux
Some Android manufacturers aggressively stop background applications.
Open the battery or application settings for Termux and allow options such as:
Auto launch
Background activity
Secondary launch
Also disable battery optimization for Termux if your device allows it.
Do the same for Tailscale.
For long-running Termux services, use:
termux-wake-lock
inside the boot script.
14. Test Everything After Reboot
Reboot the phone.
Do not manually open Termux or Tailscale.
From another computer, test Samba over Tailscale:
nc -vz YOUR_TAILSCALE_IP 4445
You should get something similar to:
Connection to 100.x.x.x port 4445 succeeded!
Then connect to Samba:
smb://YOUR_TAILSCALE_IP:4445/internal
Also test File Browser:
http://YOUR_TAILSCALE_IP:8080
If both services work without opening anything on the phone, the server is fully automatic.
15. Back Up the Configuration
Once everything works, make a backup.
Create a backup folder:
mkdir -p ~/server-backup
Back up the Termux scripts:
cp -r ~/.termux/boot ~/server-backup/
Back up the Samba configuration:
cp "$PREFIX/etc/samba/smb.conf" ~/server-backup/
If your File Browser database is in your home directory, back it up as well:
cp ~/filebrowser.db ~/server-backup/ 2>/dev/null
You now have the important server configuration saved.
Final Result
You have turned a normal Android phone into a surprisingly capable NAS:
Android Phone
│
├── Internal Storage
│
├── Samba :4445
│      └── Mac / Windows / Android
│
├── File Browser
│      └── Web access
│
├── SSH
│      └── Remote administration
│
├── Tailscale
│      └── Secure remote access
│
└── Termux:Boot
       └── Automatic startup
The biggest advantage is that no port forwarding or public IP address is required.
Tailscale provides private remote access, while Samba and File Browser provide two convenient ways to manage your files.
For an old Android phone that would otherwise sit unused, this is a surprisingly useful second life.
Common Errors We Encountered While Setting Up Android as a NAS
1. smbpasswd -a Shows Usage Instead of Adding the User
When running:
smbpasswd -a "$(whoami)"
Termux may show the Samba usage screen instead of asking for a password.
This happens because Termux is not running as root, and smbpasswd requires local mode for adding users.
Use:
smbpasswd -L -a "$(whoami)"
Then enter the new Samba password twice.
2. NT_STATUS_BAD_NETWORK_NAME When Connecting to the Share
You may see:
tree connect failed: NT_STATUS_BAD_NETWORK_NAME
even though:
smbclient -L //127.0.0.1 -p 4445 -U "$(whoami)"
shows the internal share.
In our case, the problem was the share path.
Using:
path = /data/data/com.termux/files/home/storage/shared
caused the connection to fail.
Changing it to the direct Android storage path fixed the issue:
[internal]
    comment = Internal storage
    path = /storage/emulated/0
    browseable = yes
    read only = no
    writable = yes
    guest ok = no
Restart Samba after editing:
pkill smbd
smbd -D -s "$PREFIX/etc/samba/smb.conf"
Then test again:
smbclient '//127.0.0.1/internal' -p 4445 -U "$(whoami)"
3. Samba Works Locally but Not Through Tailscale
Samba may work using the local Wi-Fi IP but fail through the Tailscale IP.
Check the Samba configuration:
testparm -s | grep -Ei 'interfaces|bind interfaces'
In our case, this was enabled:
bind interfaces only = yes
That restricted Samba to specific interfaces.
Change it to:
bind interfaces only = no
Restart Samba:
pkill smbd
smbd -D -s "$PREFIX/etc/samba/smb.conf"
After this, Samba worked through both the local IP and the Tailscale IP.
4. Android SMB Client Cannot Connect Because It Does Not Support Port 4445
Termux Samba runs on:
4445
instead of the standard SMB port:
445
Some Android SMB apps do not allow you to enter a custom port.
In our case, SambaLite could not connect for this reason.
The solution is to use an SMB client that supports a custom port and configure:
Server: YOUR_TAILSCALE_IP
Port: 4445
Share: internal
5. ss -lnt Shows Permission denied
Running:
ss -lnt | grep 4445
may show:
Cannot open netlink socket: Permission denied
This is an Android/Termux permission limitation.
It does not mean Samba is broken.
Instead, check whether Samba is running:
pgrep -a smbd
and test the port from another device:
nc -vz PHONE_IP 4445
If the connection succeeds, Samba is listening correctly.
6. ADB Pairing Succeeds but adb connect Is Refused
Wireless debugging uses two different ports:
Pairing port
Connection port
The port used with:
adb pair
is not necessarily the same port used with:
adb connect
Using the pairing port with adb connect can result in:
connection refused
The correct approach is to use the actual wireless debugging connection port shown by Android.
7. adb mdns services Shows Nothing
Even after successful wireless ADB pairing:
adb mdns services
may return nothing.
This can happen when mDNS discovery does not work correctly through the active network or VPN interface.
In our case, Tailscale was active and Android was advertising the Tailscale interface instead of behaving like a normal local Wi-Fi discovery setup.
The workaround was to use USB debugging instead.
8. scrcpy Shows “Multiple ADB Devices”
If both USB ADB and wireless ADB are connected, running:
scrcpy
may show:
ERROR: Multiple (2) ADB devices
Use USB explicitly:
scrcpy -d
or select the USB device by serial:
scrcpy -s DEVICE_SERIAL
You can also disconnect wireless ADB:
adb disconnect
Then normal:
scrcpy
will work again.
9. Tailscale Does Not Start Automatically After Reboot
After rebooting, Samba and File Browser may start correctly through Termux, while Tailscale remains disconnected.
On devices where the Always-on VPN setting is hidden, you can enable it using ADB:
adb shell settings put secure always_on_vpn_app com.tailscale.ipn
Keep VPN lockdown disabled:
adb shell settings put secure always_on_vpn_lockdown 0
Verify:
adb shell settings get secure always_on_vpn_app
It should return:
com.tailscale.ipn
After this, Tailscale should reconnect automatically after reboot.