


What is Digispark?


The Digispark is an ATtiny85 based microcontroller development board similar to the Arduino, only cheaper, smaller, and a bit less powerful.
Digispark development board comes with a USB interface. Coding can be done in Arduino C with the familiar Arduino IDE. Like Arduino, Digispark also requires a bootloader running on ATTINY85. The bootloader will occupy 2KB flash memory, leaving us with 6KB of memory for programming.

Interfaces
| Interfaces | PIN |
|---|---|
| GPIO | P0, P1, P2, P3, P4, P5 – (6 GPIO) |
| SPI | MOSI (P0), MISO (P1), SCK (P2) |
| PWM | P0, P1, P4 – (3 PWM) |
| ADC | A1 (P2), A3 (P3) – (2 ADC) |
| I2C | SDA (P0), SCL (P2) |
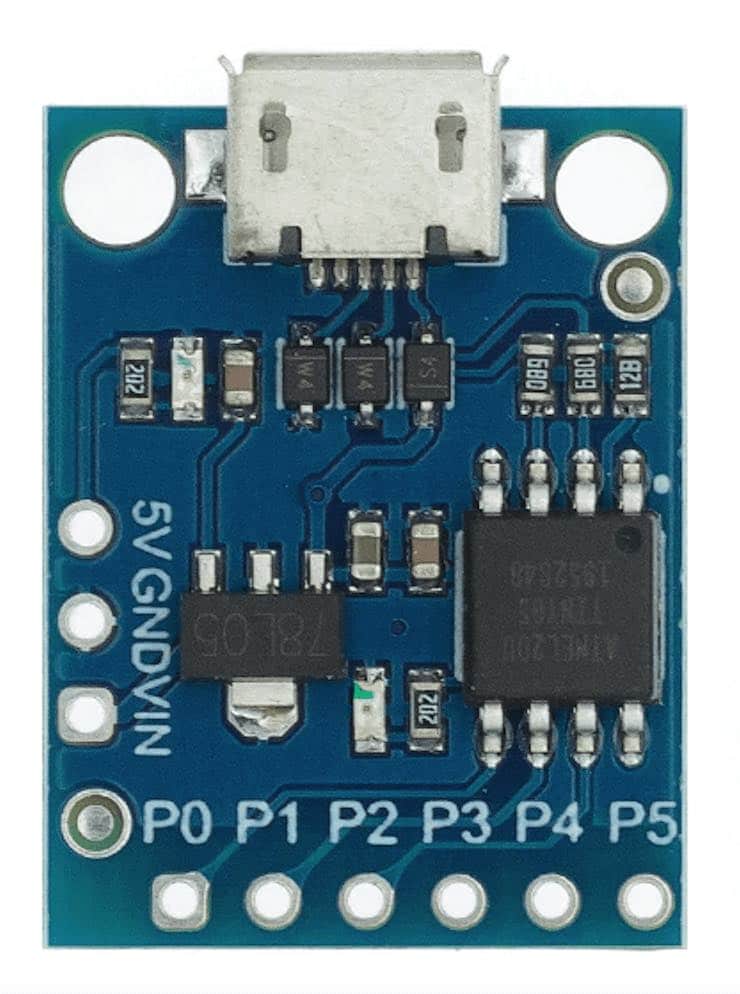
PIN out diagram

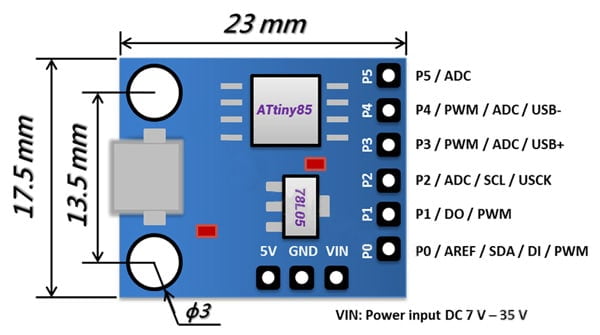

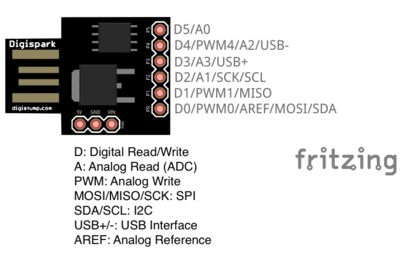
- All pins can be used as Digital I/O
- Pin 0 → I2C SDA, PWM (LED on Model B)
- Pin 1 → PWM (LED on Model A)
- Pin 2 → I2C SCK, Analog In
- Pin 3 → Analog In (also used for USB+ when USB is in use)
- Pin 4 → PWM, Analog (also used for USB- when USB is in use)
- Pin 5 → Analog In
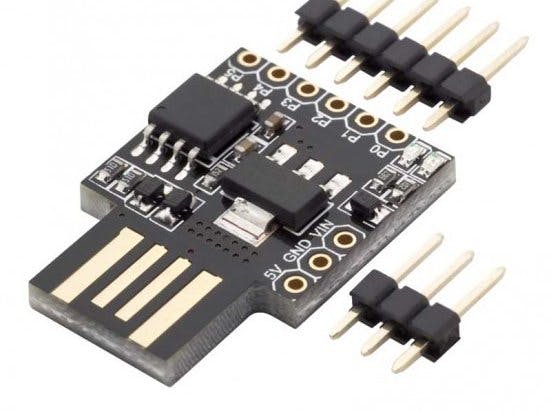
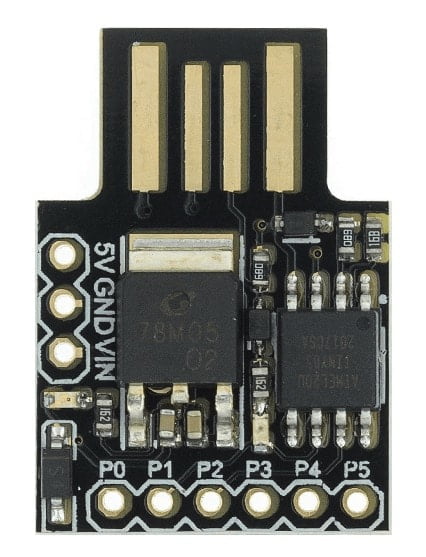
Different type of Digispark board
Digispark Attiny85 development board comes in 2 form factors, one with a micro-USB port, we will need a micro-USB cable to upload code to it. The 2nd type comes with a USB A, so we can plug it directly into the USB port of our PC or laptop without a cable.
other than the difference in the USB type all other ports and functions remain the same for both types.


How to use with Arduino IDE
The Digispark supports all features found in the IDE with the exception of the serial monitor and the burn bootloader functionality.
Many existing libraries will not work with the Digispark: For I2C devices check out the TinyWireM library, which makes it super simple to port an I2C based device library over to use with the Digispark.
Step 1: Installing Arduino IDE
Hope you have already installed the Arduino IDE, if not download and install it from this link ![]()

Step 2: Adding Additional Boards Manager URLs
- From the top menu of the Arduino IDE application, select File → Preferences to open the Preferences dialog box.
- Paste the following in the Additional Boards Manager URLs: box of the Preferences dialog box. If you have multiple URLs then separate it with comma.
http://digistump.com/package_digistump_index.json
- Click the OK button.

Step 3: Installing Digispark Board Support Package
- In the Arduino IDE, navigate to Tools → Board → Boards Manager… to open the Boards Manager window.
- Type Digispark into the search field at the top of the Boards Manager dialog box window.
- After filtering, Digistump AVR Boards is displayed in the Boards Manager then click on the Install button of the Digistump item in the dialog box, as shown in the image below.
- After clicking the Install button, the package will start installing.
- When installation completes, click the Close button.
Step 4:
Install the Digispark Windows 10 Drivers
- Download the Digispark Digistump Drivers for Windows.
- Extract the Digistump.Drivers.zip which we just downloaded.
- Double-click either DPinst64.exe on a 64-bit Windows computer, or DPinst.exe on a 32-bit Windows computer to install the Digispark drivers.
- Click on the install button when prompted.

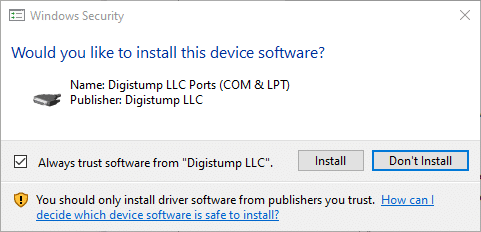
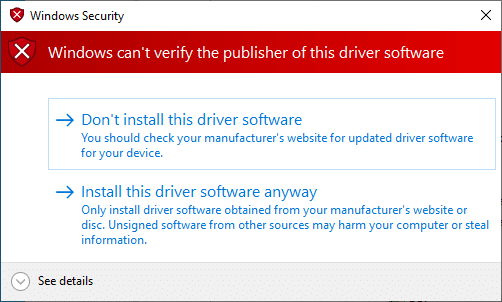
- If a dialog box pops up that displays Windows can’t verify the publisher of this driver software, click the Install this driver software anyway button.

Using Digispark in Mac
In Mac, you don’t need to separately install any driver for uploading the code. But when compiling the code you may encounter an error as shown below.
fork/exec /Users/XXXXX/Library/Arduino15/packages/arduino/tools/avr-gcc/4.8.1-arduino5/bin/avr-g++: bad CPU type in executable
Error compiling for board Digispark (Default - 16.5mhz).
To solve the above error follow the below procedure,
Exit the Arduino IDE completely. Then, from a shell prompt, you are gonna move the Digistump snowflake out of the way, and link in the current shipping version:
$ cd ~/Library/Arduino15/packages/arduino/tools/avr-gcc
$ mv 4.8.1-arduino5 orig.4.8.1
$ ln -s /Applications/Arduino.app/Contents/Java/hardware/tools/avr 4.8.1-arduino5
That’s it now you can compile the code without any errors.
Using Digispark in Linux
Check out the official Digispark Linux troubleshooting page.
Uploading the code
The Digispark works a bit differently than some Arduino compatible products. The Digispark programs with a different procedure.
First from the Tools menu select Board→Digispark (Default – 16.5Mhz)
(The Tools→Programmer & Tools→Port selection does not matter)
- Now write some code or open a Digispark example. Then click on the upload button (do not connect the Digspark attiny85 to your PC)
Note
You do not need to plug in your Digispark before clicking the upload button
- Hit the upload button. The bottom status box will now ask you to plug in your Digispark – at this point, you need to plug it in or if already pluged then unplug and replug it.
You’ll see the upload progress and then it will immediately run your code on the Digispark.
Note
If you unplug the Digispark and plug it back in or attach it to another power source there will be a delay of 5 seconds before the code you programmed will run. This 5-second delay is the Digispark checking to see if you are trying to program it.