How to program NodeMCU using Arduino IDE

Introduction

In this tutorial, We are going to learn how to use Arduino IDE to program NodeMCU.

What is NodeMCU? NodeMCU is an open source IoT platform. It includes firmware which runs on the ESP8266 Wi-Fi SoC from Espressif Systems, and hardware which is based on the ESP-12 module. The term “NodeMCU” by default refers to the firmware rather than the development kits. The firmware uses the Lua scripting language. Wikipedia

Hardware Required

ComponentsAmazon.inamazonAmazon.comamazonBanggoodbanggoodAliExpressali expressUtsource
utsource
NodeMCU ESP8266cart iconcart iconcart iconcart iconcart icon

Developer: ESP8266 Opensource Community

Type:Single-board microcontroller
Operating system:XTOS
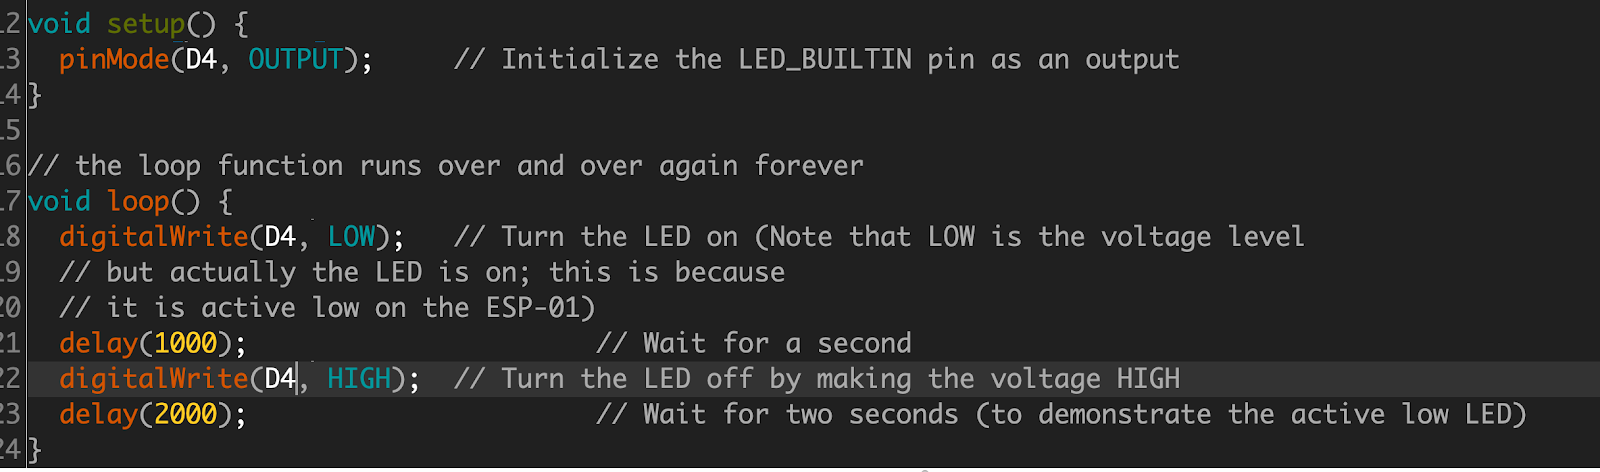
Yes, by default NodeMCU uses Lua scripting language to program NodeMCU, here We are going to learn how to program NodeMCU using Arduino C++ language.


-- Pin definition 
local pin = 7            --  GPIO 13
local status = gpio.LOW
local duration = 1000    -- 1 second duration for timer

-- Initialising pin
gpio.mode(pin, gpio.OUTPUT)
gpio.write(pin, status)

-- Create an interval
tmr.alarm(0, duration, 1, function ()
    if status == gpio.LOW then
        status = gpio.HIGH
    else
        status = gpio.LOW
    end

    gpio.write(pin, status)
end)

The above is a sample Lua script to blink an LED connected to the 7th pin ie GPIO 13 of NodeMCU.As you can see here the physical pin and the GPIO pin numbers are different in NodeMCU, below is a chart of the pin assignments,

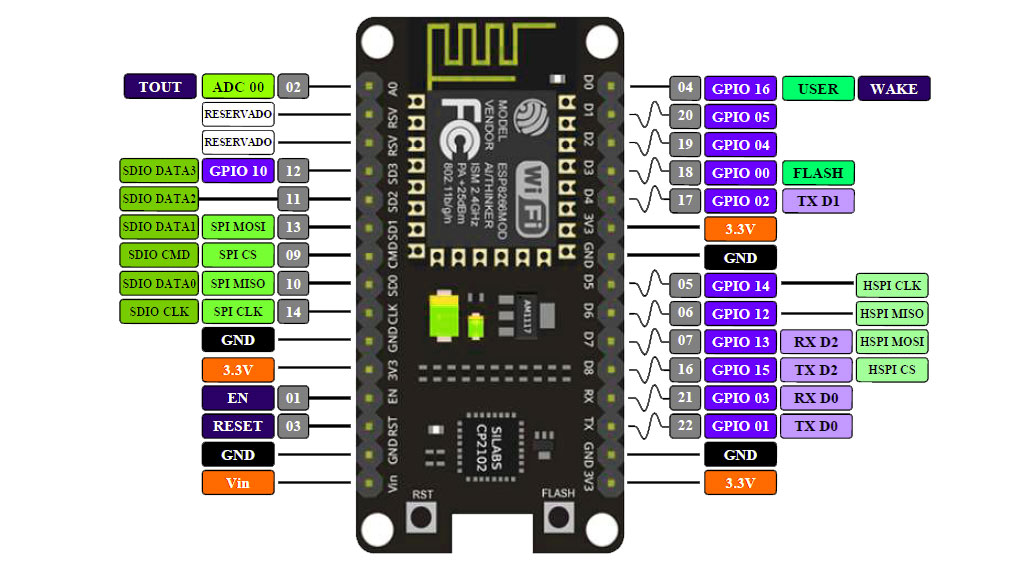
NodeMCU V 1.0 Pinout
NodeMCU v0.9 Pinout

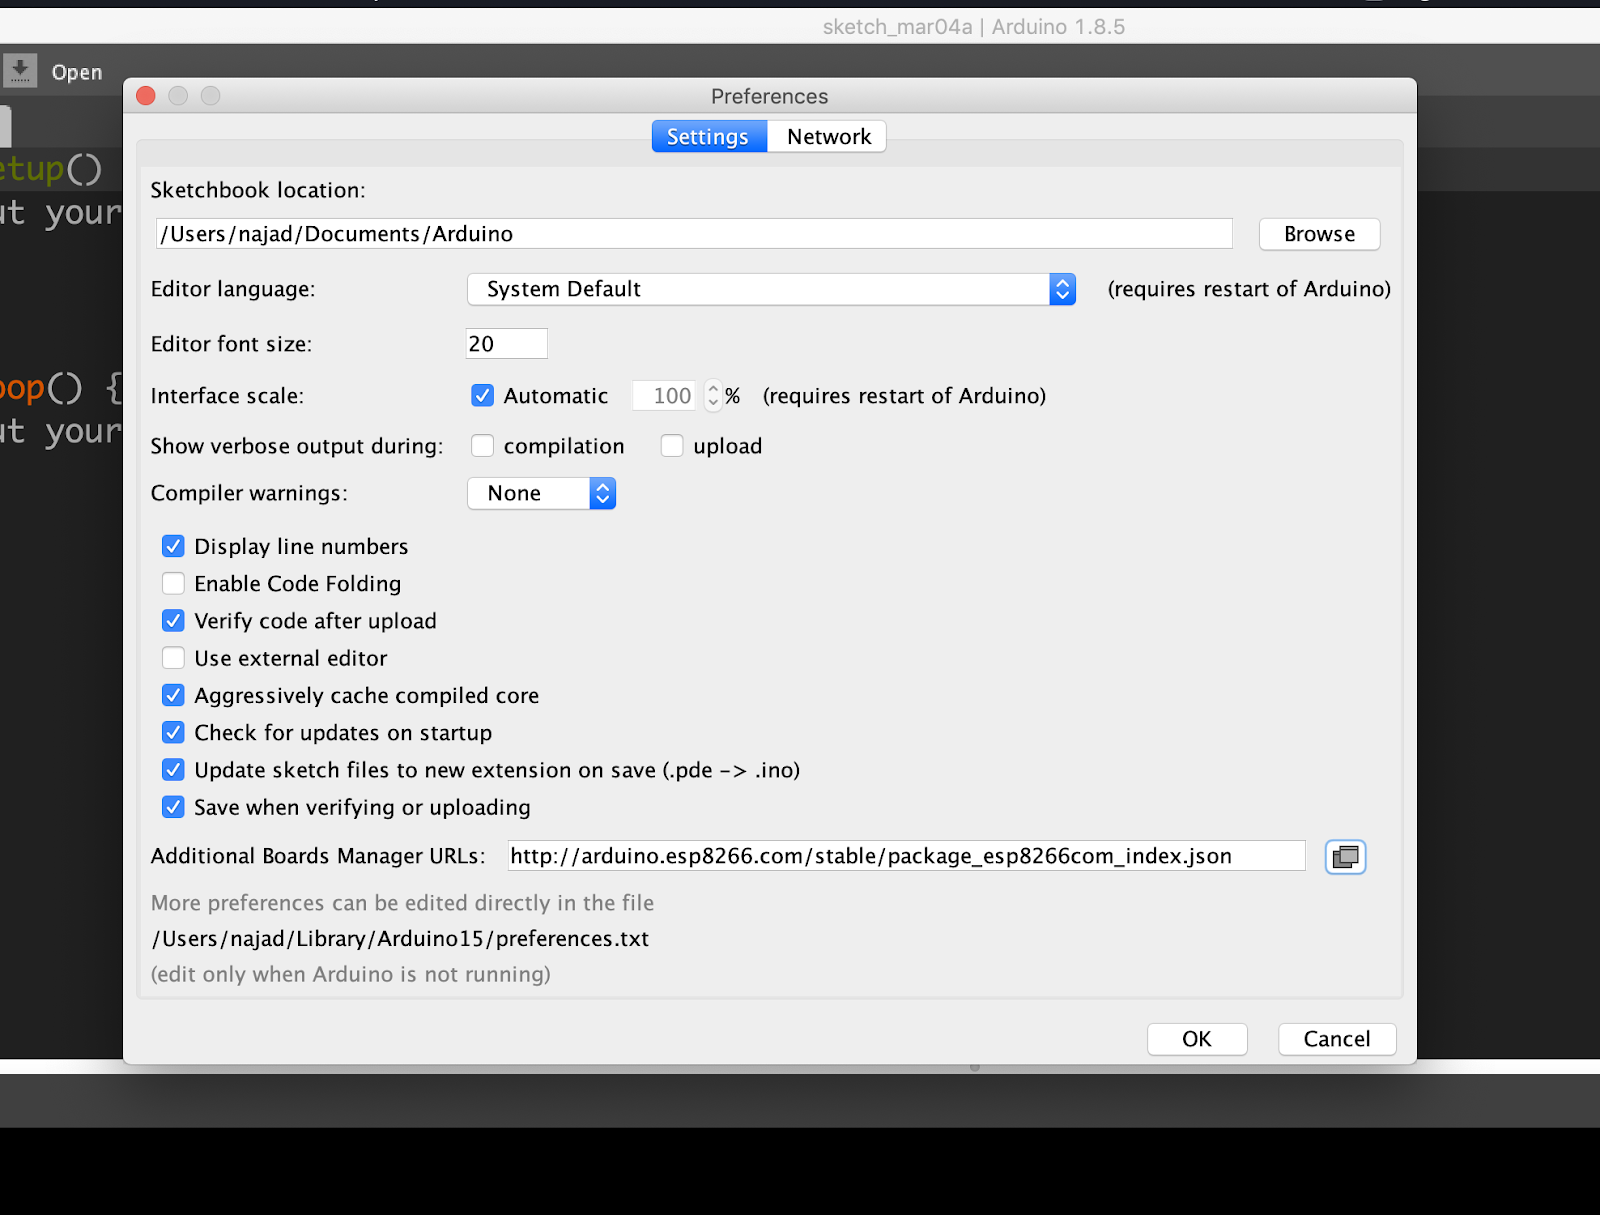
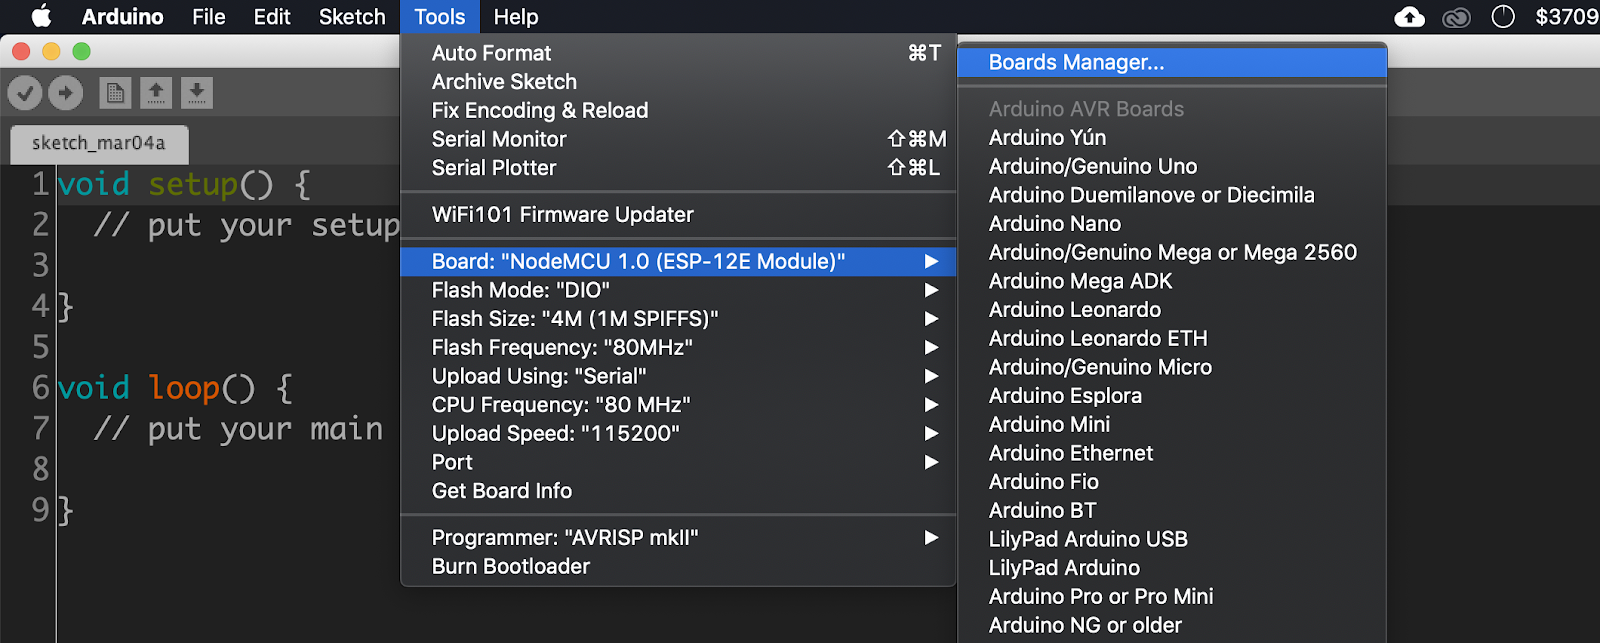
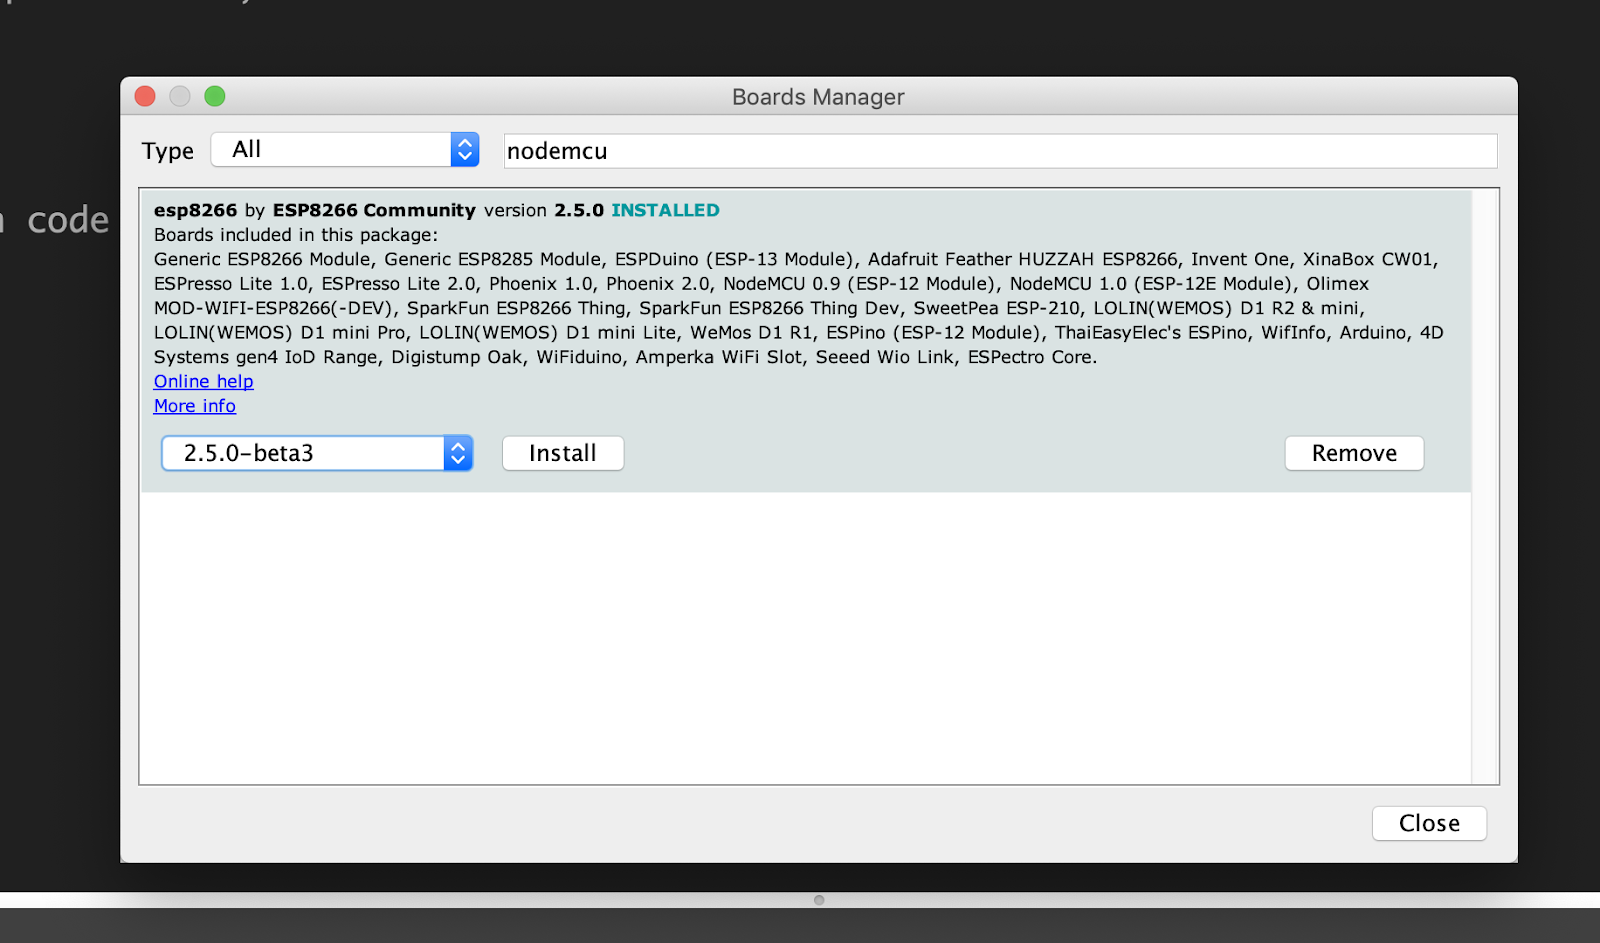
Coding in Arduino IDE
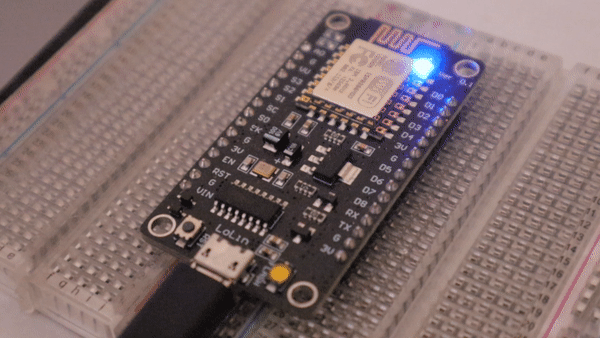
Note: When you use the NodeMCU with the Arduino IDE, it will write directly to the firmware, of NodeMCU erasing the original firmware, So if you want back the Lua SDK, use the “flasher” to re-install the firmware. You can download the flasher from their Github page https://github.com/nodemcu/nodemcu-flasher.
 
Step 1: Connect the NodeMCU with your PC or laptop with a micro USB cable.
Step 2: Download and install the drivers, You can download the driver for Mac, Linux or windows from this link https://github.com/nodemcu/nodemcu-devkit/tree/master/Drivers.
Step 3: Open Your Arduino IDE, then open preference from the file menu, then copy this link  http://arduino.esp8266.com/stable/package_esp8266com_index.json to additional board manager URLs, as shown below in the screenshot, then click ok.
 
 
Step 4: Installing Board, Open board manager from tools -> board -> board manager.
and search from “nodemcu”
 
 
Then select the latest version from the dropdown menu and click install and restart the Arduino IDE.
 
 
If everything is installed properly then you should be able to see the newly installed boards under tools -> board menu. As shown in the screenshot,
 

Testing

Now let’s test our setup by running a blink sketch in our NodeMCU.
 
Step 1:  Open the example blink program from the “example for NodeMCU 1.0” section  inside the example menu,


Step 2: Connect the NodeMCU with your computer using the micro USB cable.


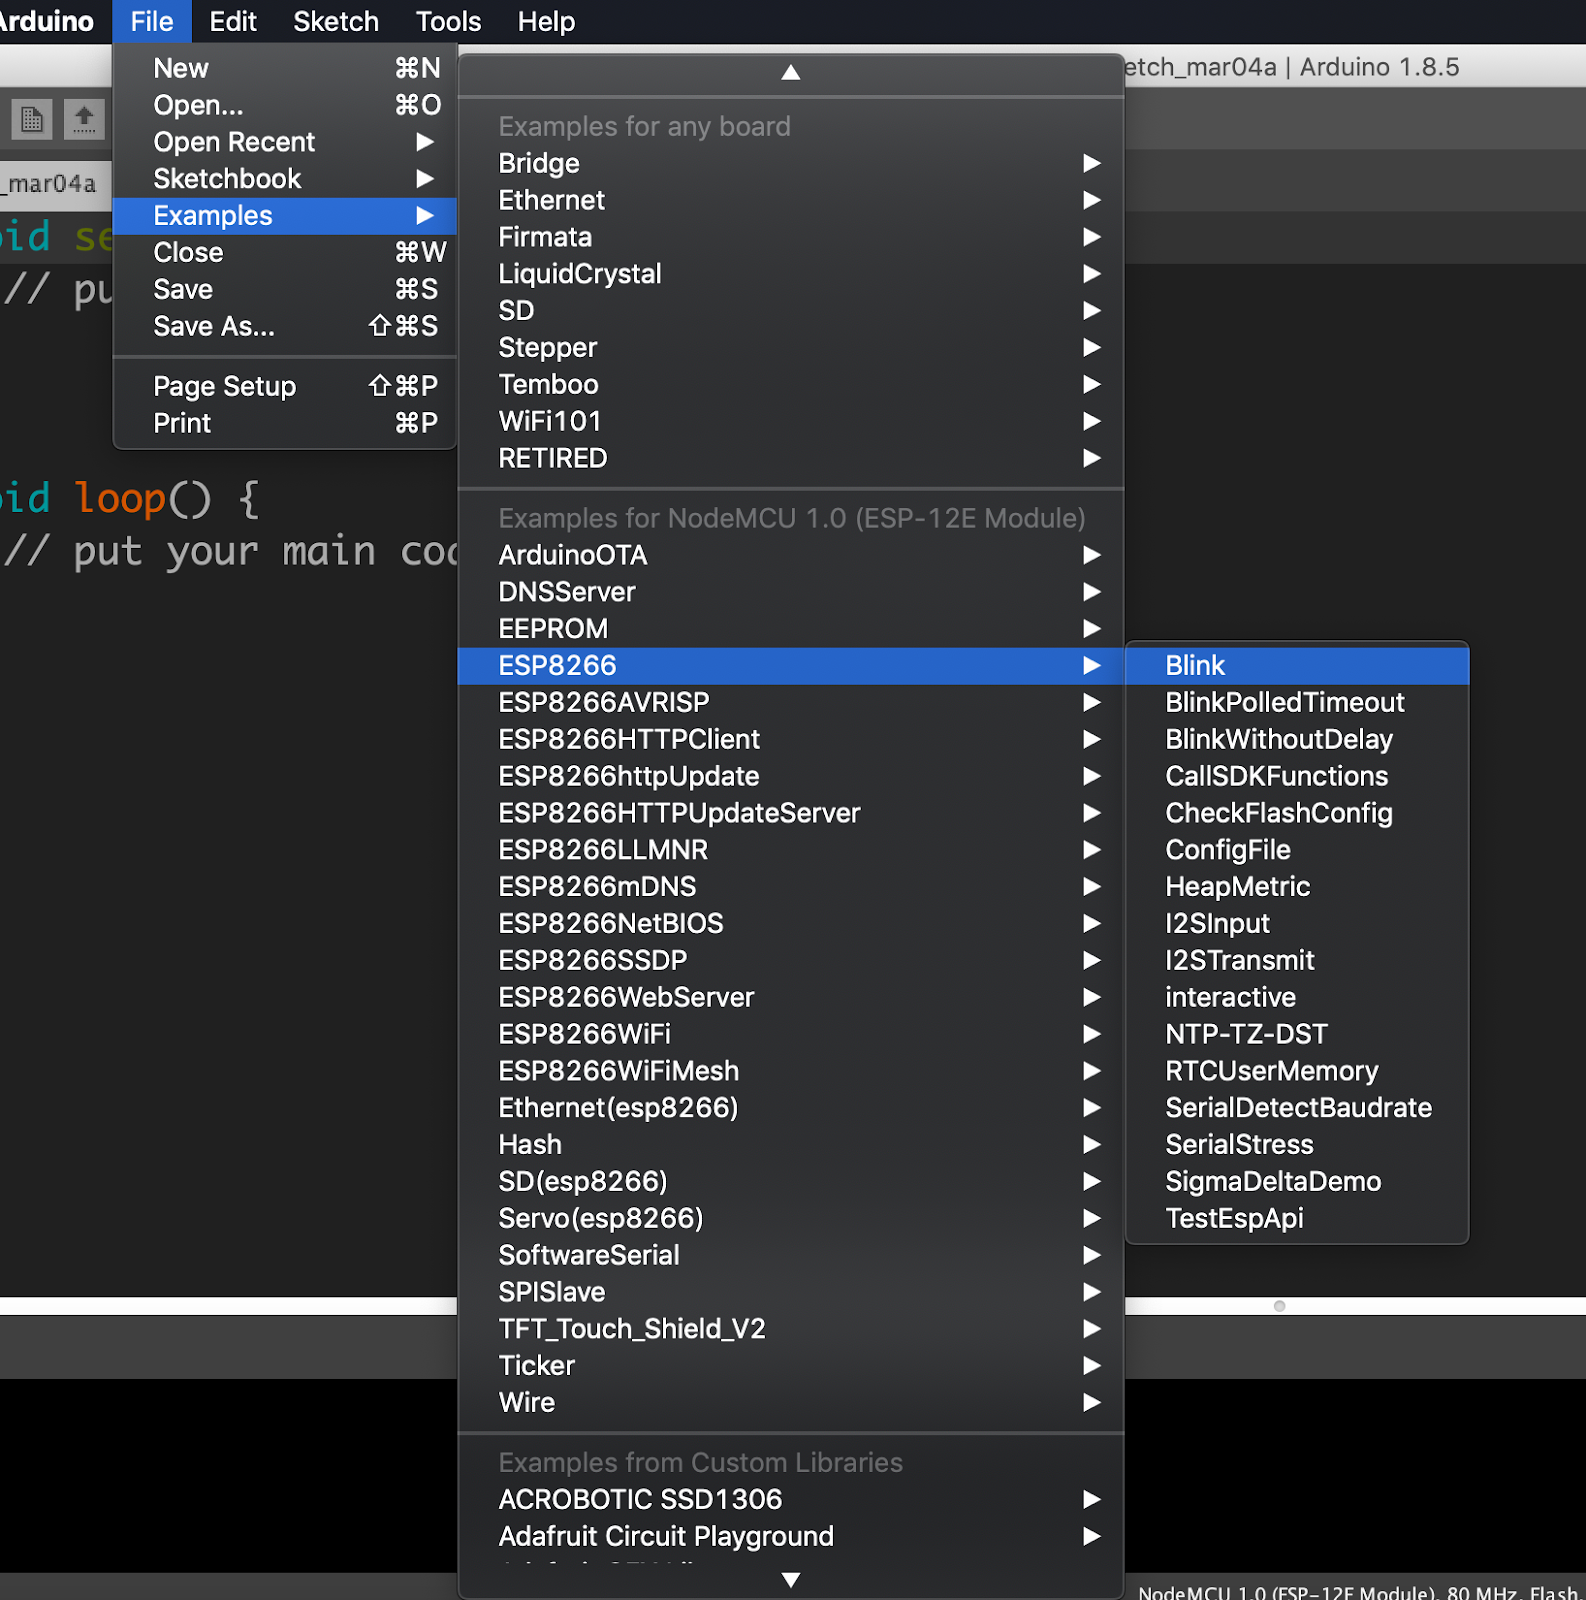
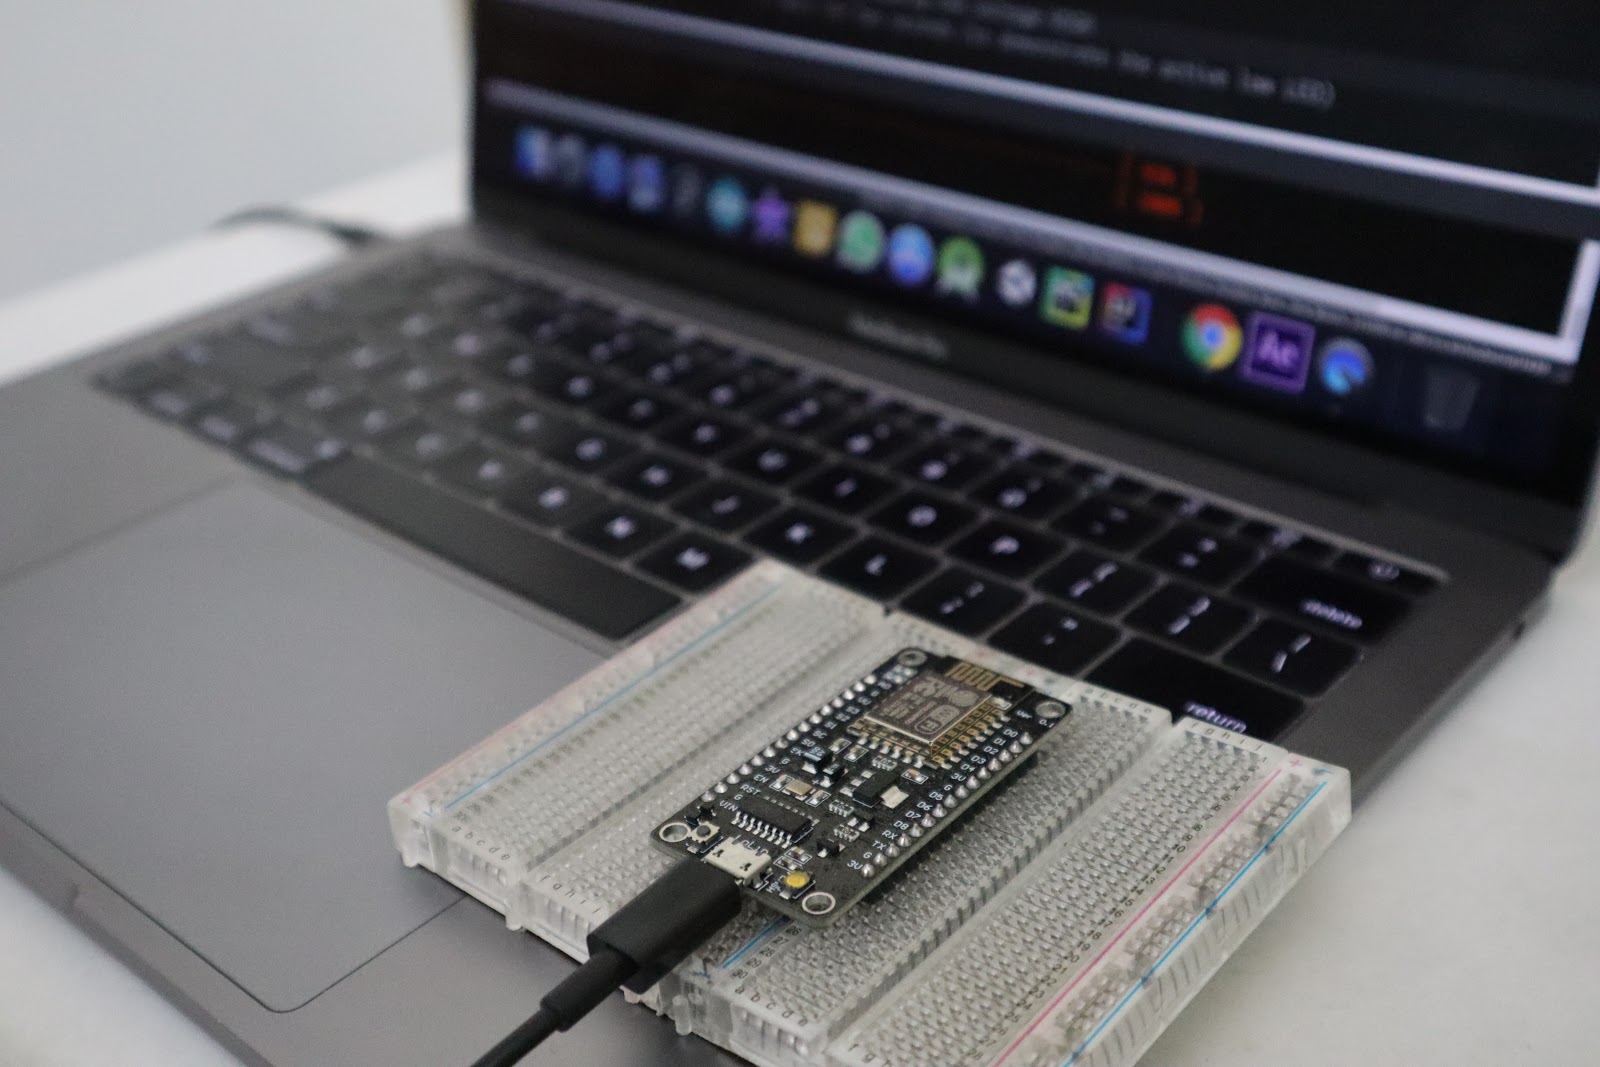
Step 3: Select and Board and Port and upload the program, that’s it, now the builtin  LED should start blinking. 


Troubleshooting

If your program uploaded properly and the LED is still not blinking then in the blinking sketch change “LED_BUILTIN” to “D4“. like as shown below,
 

Video Tutorial


To buy electronic components order from UTSOURCE

1 thought on “How to program NodeMCU using Arduino IDE”

Leave a Comment

Your email address will not be published. Required fields are marked *

Scroll to Top